Installing XpertMart
™ on Macintosh OS X
Chapter Topics
Installing XpertMart™
on Macintosh OS X
Activating the HASP Key
Running XpertMart™
Changing the Java Version
Uninstalling & Reinstalling Firebird
Installing XpertMart™
Follow these five steps:
1) Download the XpertMartInstall.dmg from
http://xpertmart.com/demo/download/demomaclicense.html
This file is a compressed disk image that contains the XpertMart
™ installation software. Wait until the download is
complete. If your web browser and system are properly configured, Disk
Copy will
launch to open the downloaded disk image. If so, skip to step 2.
If Disk Copy doesn't automatically open when your download completes,
find the XpertMartInstall.dmg file you just downloaded. It will usually
be
saved to your desktop. Double-click this image file to open it in Mac
OS
X's Disk Copy application, which will mount it as a virtual disk and
open
a new Finder showing its contents.
2) Copy the main directory to the root of your Macintosh HD
From the first step a Finder window will appear containing a folder
icon named main. Simply drag this folder icon to your Macintosh HD to
install. Do not install the main folder into the Applications folder or
XpertMart ™ will not work properly.
3) Install the FirebirdDBMS.pkg
The Finder window also contains a file named FirebirdDBMS.pkg. Double
click this file to install the Firebird DBMS. Simply follow the
instructions on screen.
Warning: make sure you only install the Firebird DBMS once. Even if at
a later time you download a new version of XpertMart
™ you should not reinstall the Firebird DBMS if it is
installed already.
4) Remove unneeded files
Once XpertMart™ is installed, you
can safely "Eject" the XpertMartInstall virtual disk and dispose of the
XpertMartInstall.dmg file you downloaded, they'll be cluttering up your
desktop and you don't need them any more. You can drag them to the
Trash
icon.
5) Restart your Mac.
Your Mac has to be restarted before you use XpertMart
™ for the first time.
Activating the HASP Key
The HASP key is used to restrict unauthorized access to XpertMart
™ and must be activated before you can begin using the system.
Run this process before you plug the HASP key into the USB port of your
computer. To activate the HASP, double-click the "HDD-Unified-Installer.sit.hqx"
file. This will unpack a folder with a file called "aksusb Installer" in
it.
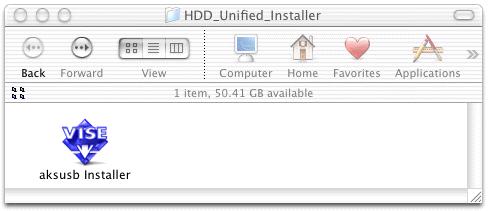
By double-clicking on the "aksusb Installer" file a window will open up
so you can install the HASP drivers. Click on <Continue> and
follow the instructions.

Your HASP key is now activated. You do not need to restart the computer.
You can now plug the HASP key into the USB port and enter XpertMart
™ by double-clicking on the "XpertMart.jar" file in the
/Main directory, or by using the desktop shortcut you created.
Running XpertMart™
To begin using XpertMart™ you have
to double-click the XpertMart.jar icon that is located in the /main
directory in your Macintosh HD.
To make it easier to access XpertMart™
you can create an alias to it. For example drag the XpertMart.jar icon
to your Dock for easy access or press the Command and Option keys while
you drag the icon to another folder or the desktop.
Changing the Java Version
For XpertMart™ to run
under optimal conditions it needs to run under version 1.3.1 of the
Java Runtime Environment (JRE). Since Mac OS X runs JRE version 1.4 by
default, generally you should first switch to version 1.3.1.
However, when you first install XpertMart™
from a .dmg file it is ok to keep a different verion of Java as the
default because the .dmg file contains instructions on which Java
version is to be used to run XpertMart™.
So you would only really need to switch Java version if you were trying
to run XpertMart ™ straight from the
XpertMart.jar file. (For example, once you downloaded the .dmg you then
decided to copy over the files to another computer).
To change the Java version, open the Terminal screen or shell:  The Terminal can be found in
Applications>Utilities>Terminal. Once the Terminal screen is
open, enter the following instructions:
The Terminal can be found in
Applications>Utilities>Terminal. Once the Terminal screen is
open, enter the following instructions:
a) Login as the system administrator by entering
this command:
shell> sudo su root
b) Enter your password
c) Change directories to the directory where version
1.3.1 is located:
shell> cd /System/Library/Frameworks/JavaVM.framework/Versions
d) Erase the CurrentJDK link:
shell> rm CurrentJDK
e) Create a new link that points to the 1.3.1
directory:
shell> ln –s 1.3.1 CurrentJDK
f) Logout of the session as administrator:
shell> exit
Uninstalling & Reinstalling Firebird
If for any reason your installation of Firebird on OS X is not
installed
correctly or working properly then you need to uninstall the current
Firebird
in order to successfully do a new install. Reinstalling Firebird on top
of
a working Firebird will cause it to stop functioning!
To uninstall Firebird, open the Terminal screen or shell: The Terminal
can be found in Applications>Utilities>Terminal. Once the
Terminal
screen is open, enter the following instructions:
a) Login as the system administrator by entering this command:
shell> sudo su root
b) Enter your password
c) Change directories to the directory where Firebird is located:
shell> cd /Library/Frameworks
d) Erase the Firebird directory: (Note: This is a very powerful command
with no "undo" so type it exactly as written here.)
shell> rm -fr Firebird.framework
e) Logout of the session as administrator:
shell> exit
You can then proceed to reinstall Firebird.
Copyright
© 2003 Dinari Systems LLC