Installing XpertMart
™ on Macintosh OS X
Chapter Topics
Changing the Java Version
Installing the PostgreSQL Database Manager
Setting-Up a New PostgreSQL Database
Restoring an Existing PostgreSQL Database
Installing XpertMart™
Activating the HASP Key
Configuring the Database in XpertMart
™
There are six steps to installing XpertMart™
on the Macintosh OS X platform: the Java version running on the Mac OS
X must be changed; the database manager must be installed; the database must
be prepared; XpertMart™ must be installed;
the HASP key needs to be activated; and XpertMart™
needs to be configured to read the right database.
Changing the Java Version
For XpertMart™ to run under
optimal conditions it needs to run under version 1.3.1 of the Java Runtime
Environment (JRE). Since Mac OS X runs JRE version 1.4 by default, you must
first switch to version 1.3.1.
To change the Java version, open the Terminal screen or shell:  The Terminal can be found in Applications>Utilities>Terminal. Once
the Terminal screen is open, enter the following instructions:
The Terminal can be found in Applications>Utilities>Terminal. Once
the Terminal screen is open, enter the following instructions:
a) Login as the system administrator by entering this
command:
shell> sudo su root
b) Enter your password
c) Change directories to the directory where version
1.3.1 is located:
shell> cd System/Library/Frameworks/JavaVM.framework/Versions
d) Erase the CurrentJDK link:
shell> rm CurrentJDK
e) Create a new link that points to the 1.3.1 directory:
shell> ln –s 1.3.1 CurrentJDK
f) Logout of the session as administrator:
shell> exit
Installing the PostgreSQL Database Manager
The next step is to install the database manager you are going to use to
store your XpertMart™ data. The
default database manager XpertMart™ uses
on the Mac OS X is PostgreSQL. If you plan on using a different database
manager, contact your Authorized Distributor for specific instructions.
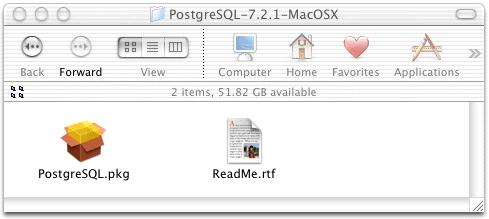
In the Install CD you will notice there are two folders: PostgreSQL and
Main. Open the PostgreSQL folder and doubleclick on the "PostgreSQL-7.2.1-MacOSX.tar.gz"
file. This will unpack a folder with two files: PostgreSQL.pkg ad ReadMe.rtf.
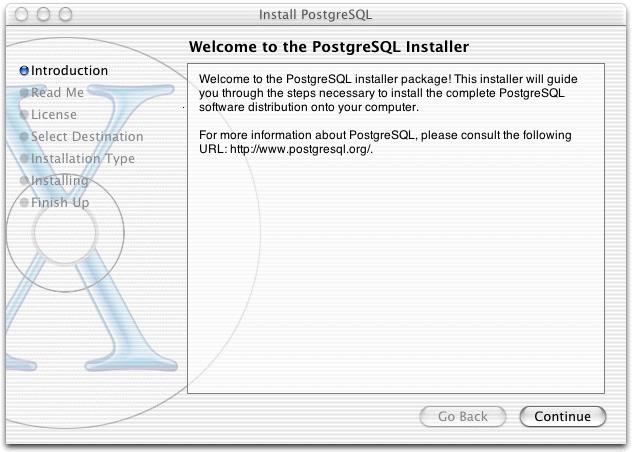
Install the PostgreSQL database manager (DBMS) by double-clicking on the
PostgreSQL.pkg file. You will need to enter your system administrator password.
A window with an auto-install wizard will open up, follow the instructions
to complete the PostgreSQL installation.
When the installation is finished, reboot your computer so that the PostgreSQL
server scripts execute. You can verify that the PostgreSQL server scripts
have executed properly by opening the Process Viewer application  found in Applications>Utilities.
Setting-Up a New PostgreSQL Database
Now that the PostgreSQL DBMS is installed you need to create a new database
to use. To do this, open a Terminal screen and enter the sequence of instructions
that follows.
a) Begin by entering entering the path or location of
the PostgreSQL command files:
shell> setenv PATH ${PATH}:/Library/PostgreSQL/bin
b) Next, create a new PostgreSQL user with system administrator
priviliges. You will be asked to enter a password for this user:
shell> sudo –u postgre createuser
Password: *****
Enter name of user to add: xpertmart
Shall the user be allowed to create databases? y
Shall the user be allowed to create more new users? y
CREATE USER
c) Finally, create the database:
shell> createdb -U xpertmart -W main
Note that the "xpertmart" parameter refers to the user
name and "main" refers to the name of the database. You will later be asked
for the password, which should be "masterkey".
You are ready to go to the next step: Installing XpertMart
™.
Restoring an Existing PostgreSQL Database
You may have a pre-existing PostgreSQL you wish to use instead
of starting with a totally blank database. If this is the case, after you
have installed the PostgreSQL DBMS you will want to enter these instructions
into a Terminal screen (instead of the instructions described previously
for setting-up a new database
):
a) Begin by entering the path or location of the PostgreSQL
command files:
shell> setenv PATH ${PATH}:/Library/PostgreSQL/bin
b) Assuming the database you want to restore is called
"main" and is found in the /Main/Restore directory, you would enter the
following:
shell> sudo -u postgre psql -d template1 -f /Main/Restore/main
If the database to be restored is found in a different
directory, substitute the correct directory for "/Main/Restore".
Installing XpertMart™
Once you have installed the PostgreSQL DBMS and created a database, copy
the "Main" folder from the Install CD onto your hard drive. Note that the
Main folder should have the following contents:
XpertMart.jar file: this is the XpertMart™
application;
Drivers folder: all of your printing drivers (Java .class files)
are stored here;
Reports folder: all of your reports (.rpt files) are stored here;
In folder: used during the synchronization process to store files
download from the FTP that need to be processed;
Out folder: used during the synchronization process to store files
that will be uploaded to the FTP;
HDD-Unified-Installer.sit.hqx file: an auto-executable file used
to activate the HASP key
;
libtxl32.jnilib: a Java driver you need to run XpertMart
™, do not erase this file, it needs to be in the same directory
the XpertMart.jar file is in.
The "In" and "Out" folder each should have a subdirectory called "comp"
where compressed files are stored during the Synchronization process.
IMPORTANT NOTE: Mac OS X, like all operating systems derived from UNIX,
is case-sensitive. This is very important when you setup the configuration
of the system later on. For example, if the Syncrhonization is looking to
send files ready to be uploaded to the FTP to the "out" folder but the directory
you've created is called "Out" the process will fail. The same holds true
for your "Drivers" and "Reports" folders, for the name of your database ("main"),
or for any and all names you use for files and directories. Make sure you
are consistent in your use of capitalization.
If you want to have a desktop shortcut to XpertMart™
(recommended) then open a Terminal screen and enter the following instructions:
	shell> cd
	shell> cd Desktop
	shell> ln -s /Main/XpertMart.jar XpertMart
Activating the HASP Key
The HASP key is used to restrict unauthorized access to XpertMart
™ and must be activated before you can begin using the system.
Run this process before you plug the HASP key into the USB port of your
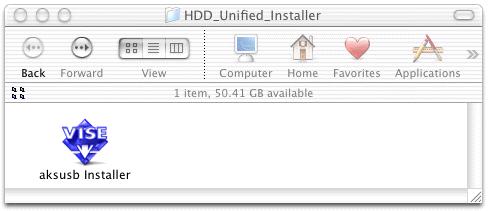
computer. To activate the HASP, double-click the "HDD-Unified-Installer.sit.hqx"
file. This will unpack a folder with a file called "aksusb Installer" in
it.
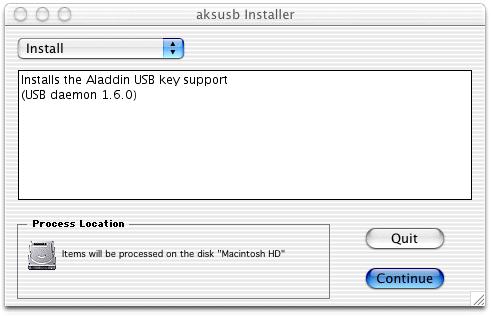
By double-clicking on the "aksusb Installer" file a window will open up
so you can install the HASP drivers. Click on <Continue> and
follow the instructions.
Your HASP key is now activated. You do not need to restart the computer.
You can now plug the HASP key into the USB port and enter XpertMart
™ by double-clicking on the "XpertMart.jar" file in the
/Main directory, or by using the desktop shortcut you created.
Configuring the Database in XpertMart™
There's one last step before you can begin using XpertMart
™: make sure you are reading the right database. When you
double-click the "XpertMart.jar" file for the first time, you will be asked
if you wish to modify the configuration. Click <OK> and then
go to the Database tab of the File Configure menu, as shown below:
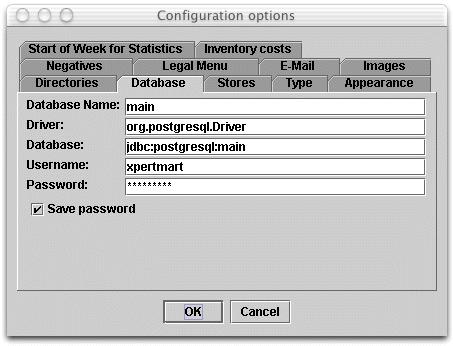
Make sure that the following parameters appear in the right fields:
Database Name: main
Driver: org.postgresql:main
Database: jdbc:postgresql:main
Username: xpertmart
Password: masterkey
Click <OK> when you are finished.
Congratulations! You are ready to begin using XpertMart™.
Copyright
© 2003 Dinari Systems LLC