XpertAccounting (tm)

    XpertMart includes an integrated accounting program called XpertAccounting (tm). XpertAccounting is first of all a stand-alone accounting program, that is you can use it to enter and process accounting information independent of XpertMarts POS and inventory control program. Of course the real power of XpertAccounting is its integration with XpertMarts POS and inventory control program. XpertMart (tm) allow you to configure into the POS and inventory control program account numbers and instructions so that all the transactions carried out in POS and inventory control can automatically be applied to accounting. This represents a drastic reduction in labor required to do this and also insure accuracy in posting this activity to accounting.

Accounting in a Relational Database

    One feature of XpertAccounting (tm) is worth pointing out at the start. XpertAccounting (tm) is built upon XpertMarts (tm) relation database philosophy. As a result we wanted to make sure the power of a relational database was applied to the accounting process. To do this we changed slightly the most basic part of accounting which is the account numbers themselves. We still use account numbers and as you will see you can pretty much make these whatever you would like as far as number of digits and levels. What we added was a relational nature to the way an account number is made.

    Traditionallly we have a structure to our account numbers based on the position of digits. The first digit or digits represents the general area or section of our chart of accounts. For example we may know that if the first digit is 1 then this is an asset account or if the first digit is 2 then it is a liability account. Then generally there is some awkward method of determining where these account groups start and end, how they are represented on reports and so forth. In XpertAccounting (tm) we have a catalog we call Top Level Accounts and in this catalog we enter these first digits and what they represent. For every account we select the Top Level Account it is related to. In this way each account number is related to a top level account. This simplifies the whole reporting process and allows us to do a lot more with reports.

    In the same fashion often in an account number the last digit or digits represents a department or cost center. Again there is some awkward method of breaking this out in reports. In XpertAccounting (tm) we have a GL Departments catalog. In the GL Departments catalog we enter our departments digits and what the name of the department is. For each account then we can select to which GL Department it is related to. Again this reduces errors and simplifies reporting on these departments or cost centers.

    In the same way, since XpertMart (tm) is designed from the ground up to be mutli-store if we wish we can separate our accounting entries per store. If we choose to do this then we select for each account what store it belongs to from the stores catalog. This again gives us the advantages of reduced errors in account numbers and enhanced report capabilities.

    In addition to theses parts of each account number you can also have up to four different levels of account numbers. Each level is kept as a separate field in the accounts catalog, so it is easy to use each level in an independent way on your reports.

    Most important of all, this allows you to exploit your information in a relational fashion but in the end you have your account numbers and they will be and look just like you want them to.

    We will see how all this works as we get into the details of XpertAccounting (tm).

Configuration

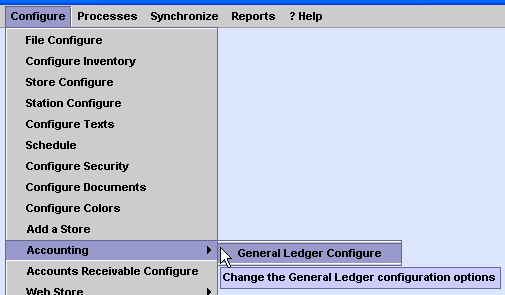
    XpertAccounting (tm) allows the user to select many of the ways in which you want to use the accounting. All of these options are found in the configuration section. To enter XpertAccountings configuration section you select this option from XpertMarts main menu under Configure then Accounting then General LEdger Configure as you can see here:      


    Once you have opened Configure General Ledger you will see several sections of configuration on the left. The first of these is General Ledger Posting which is show here:


    General Ledger Posting simply show the posting date that will be used to post journal entries. You do not need to change this date here are you will be asked which posting date you would like to use everytime you make a journal entry.

    The next section is General Ledger General Values as can be seen in this screen shot:


    Here you select whether each store is going to be a separate company for accounting purposes.

    The next section is called General Ledger Accounts as seen in this image:
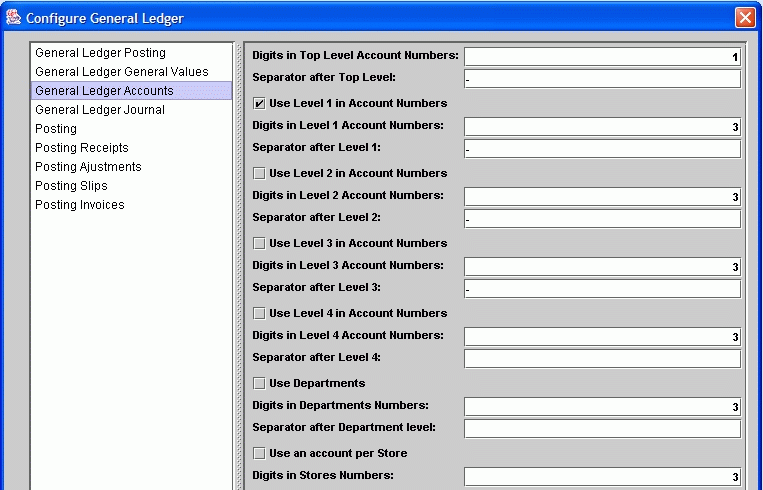


    The first option is to pick how many digits you want to use in your Top Level Account Numbers.  You also pick what separator you want after the top Level Account Number and any following digits of the account number. The separator can be any character or characters. You do not have to use a separator.  If you do not choose to use a separator then the digits following the Top Level Account Numbers will be followed immediately by the digits of the next level of the account number.

    In addition to the Top Level Acount portion of the account number you can have up to four additional levels in your accounting. For each one of these possible levels you choose first whether you want to use this level. Then you can choose how many digits each level will use. Last of all you select what separator character or characters you want to have after each one of these levels.

    As mentioned in the introduction if you wish you can use departments or cost centers as part of each account number. If you wish to use departments then you check the box here. You also indicate how many digits you wish to use for the department. Again you indicate what separator you would use after the department number.

    Last of all you decide if you are going to specify if there is a separate account for each store. If you select this option then you also would indicate how many digits you want to use for the store number.

    In all your account number can up to seven levels in depth and can have as many digits as you wish. You can show separations as you wish also.

    The next configuration section is General Ledger Journal as can be seen here:


    You have the option here of choosing to allow descriptions on each journal detail line. There is a description line for each journal entry itself. In addition you can write a short description on each line of a journal entry if you select this option.

    The next configuration option is Posting as shown here:


    These configuration options have to do with the journal entries that will automatically be generated from XpertMarts POS and inventory transacitions.

    If you have more than one store you can choose whether you want each stores journal entries to be on separate journal entries or whether all the entries can be summed up and put on a single journal entry.

    Finally, as we post POS and inventory transactions to our accounting we will often encounter the need to post a rounding error. These rounding errors are usually just 0.01 in our base currency. Here we select the account number we want to post these entries to. You will need to enter your account numbers first and then come back here and select which one of those accounts is used to post the rounding errors.

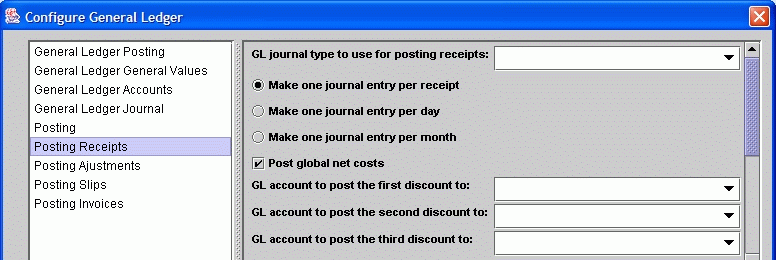
    The next section has to do with posting Receipts, that is receipts for merchandise received from vendors. This seciton is shown here:  


    The first thing you select is which journal type you want to use to post receipts that are posted automatically by XpertMart (tm). You may only use one journal type for all of your postings if you wish, or you can use different types for sales, receipts, adjustements and so forth.

    We have thee options for posting receipts. We can make a separate journal entry for each receipt, we can add up all the receipts for the day and make one journal entry for the day or we could add up all the receipts for the month (or period specified when applying transactions) and post them on one journal entry. Here you select which of these options you wish to use.

    You also need to select how you want to post costs for merchandise received. If you select Post Global Net Costs, then the the discounts entered on the merchandise receipt will be prorated over the merchandise received to get a net cost. This net cost would then be entered on the journal entry.

    If you do not choose to post global net costs then you need to specify to which account each one of the three discount amounts will be posted. Here again you must enter the accounts into the acounts catalog and then you can select the accounts from these menus.

    The next configuration section is for Posting Adjustments as see here:


    Here again you select which journal type you want to use to post adjustments that are posted automatically by XpertMart (tm).

    We have thee options for posting adjustments. We can make a separate journal entry for each adjustment document, we can add up all the adjustment documents for the day and make one journal entry for the day or we could add up all the adjustment documents for the month (or period specified when applying transactions) and post them on one journal entry. Here you select which of these options you wish to use.

     The next section has to do with posting transfer slips. You can see this section here:


   Again you select which journal type you want to use to post transfer slips that are posted automatically by XpertMart (tm).

    We have thee options for posting slips. We can make a separate journal entry for each  transfer slip, we can add up all the slips for the day and make one journal entry for the day or we could add up all the slips for the month (or period specified when applying transactions) and post them on one journal entry. Here you select which of these options you wish to use.

    You also need to specify which account is to be used to post in transit inventory to. You must enter the account number in the accounts catalog and then select it here.

     The next section has to do with posting sales invoices. You can see this section here:


    You need to select which journal type you want to use to post sales invoices that are posted automatically by XpertMart (tm).

    We have thee options for posting invoices. We can make a separate journal entry for each  invoice, we can add up all the invoices for the day and make one journal entry for the day or we could add up all the invoices for the month (or period specified when applying transactions) and post them on one journal entry. Here you select which of these options you wish to use.

Catalogs

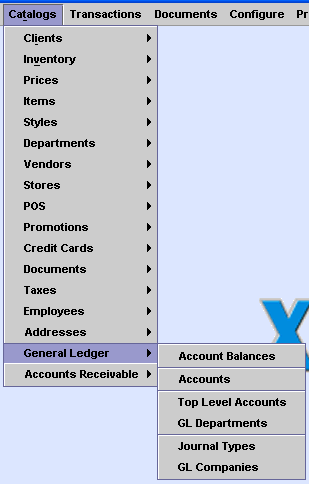
    There are several catalogs used with XpertAccounting (tm). To open any of the catalogs you select the General Ledger section under the Catalogs option from the main menu as shown here:


    The first catalog listed is the Account Balances catalog. You choose this catalog as shown here:


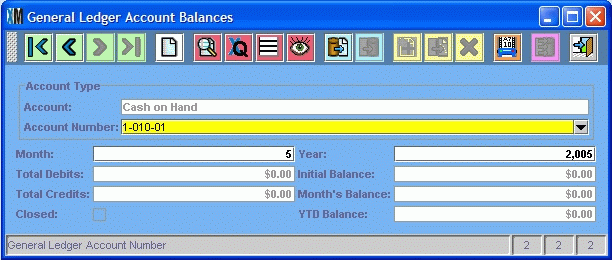
    Once you select this option you will see the Account Balances catalog as shown here.


    There will be one catalog entry for each account for each month. You will use this catalog if you want to look at account balances directly. You will not need to make entries in this catalog, they will be entered automatically as you enter new accounts or open new accounting periods.

    The next catalog show is the Accounts catalog. You choose to open this catalog from the catalogs menu as show here:


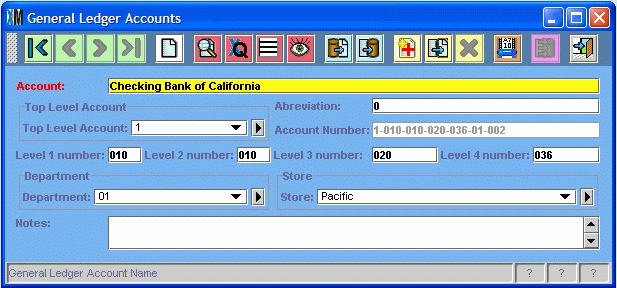
    Once you select this option the catalog opens as show below:


    For each account you enter the account name. Each account name must be unique. You can also enter an account abreviation. Each abreviation should be unique also. When you are making manual journal entries you can enter accounts by typing their abreviation which can be very simple and fast.

    As explained in the introduction for each account you need to select the Top Level Account it belongs to. You need to enter your Top Level Accounts first as explained below. Here you just select the top level account.

    You cannot enter or edit the account number itself.  The account number will be automatically formed as you select and enter all the parts of the account number.

    NOTE: This catalog will look different to you depending on the account levels, numbers of digits and other options you selected in configuration options.

    You can enter the number for each one of the levels 1 through 4. These numbers will automatically be zero filled to have as many digits as you specified in the configuration.

     If you selected to use GL Departments then you select the depart for each account. You will need to enter the Departments in the GL Departments catalog explained below.

    Finally if you chose to have accounts per store you need to select the store that the account applies to. The stores are taken from the stores catalog from the XpertMart (tm) POS and inventory control.

    To use the Top Level Accounts catalog you choose the option from the catalog menu as shown here:


    Once you select this option you will see the Top Level Accounts catalog as seen in this screen shot:
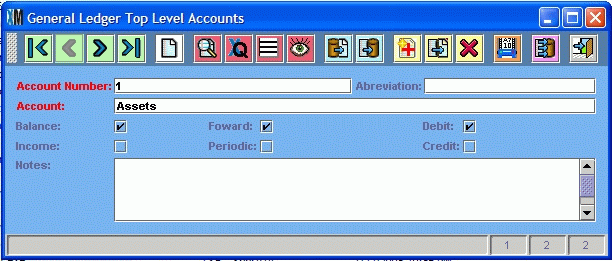


    You need to enter the account number for the Top Level Account. This is not a whole account number but the initial part of the account number that will be on every account belonging to this top level account.

    The abreviation field is used mainly for reports where you may need a shorter name for the top level account.

    You also add an Account name. This is also used for reports. This will give you a good description of your account groups.

    Select whether the accounts of this type are Balance accounts or Income acounts. Check balance if this type of account is included in the balance statement. Check Income if this type of account is included in the income statement.

    In the same way you specify whether the account balances will be moved forward or are periodic. Check foward if this balance is carried over to new accounting year. Check periodic if this account is set to zero a the beginning of the year

    Last of all you check whether this account is Debit or Credit. Check debit if this type of account normally has a debit balance. Check credit if this type of account normally has a credit balance.

    To open the GL Departments catalog you select the option from the General Ledger catalogs menu as seen here:


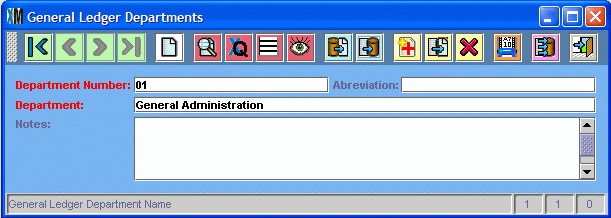
    Once you open the GL Departments catalog you will see this:


    In the Department Number you enter the number for this department or cost center. You can also enter an abreviation for the department which can be useful for reports where you need a smaller name for the department. Last of all you enter the department name.

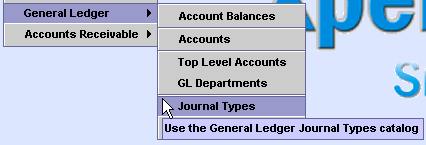
    To open the Journal Types catalog you select the option from the catalogs menu as shown in this screen shot:


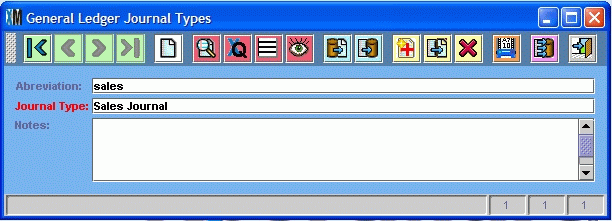
    Once you open the Journal Types catalog you will see this:


    You only need enter the name of the Journal Type and the abreviation for the Journal Type. Both of these may be used in reports. Each Journal Type will have its own serial numbers.

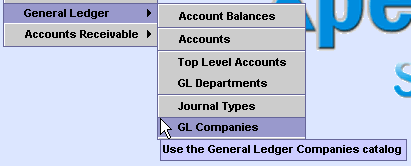
    If you are going to use different GL Companies then you want to use the GL Companies catalog. To open the GL Companies catalog you select the option from the GL Catalogs menu as shown;


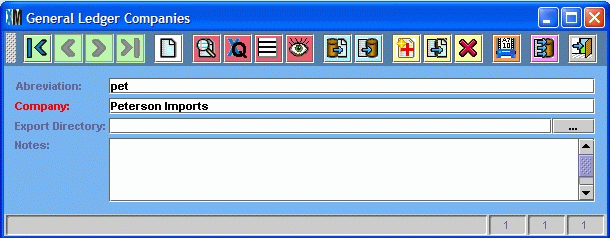
    Once you open the catalog you will see this:


    Once again the abreviation field is mainly to use in reports. You enter the company name for the GL Company. Once you have entered your GL Companies in the stores catalog of XpertMart you can assign a GL Company to each store. Each store could be a separate GL Company or several stores might all belong to one company.

    The Export Directory is used to indicate where exported accounting data would be stored. This is used for accounting links like our Business Works (tm) accounting link.

Journal Entries

    To make journal entires you need to select the option under Transactions - General Ledger - Journal Entries as shown here:


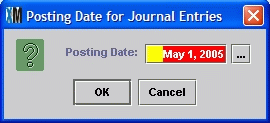
    The first thing you will be asked after you select this option is the Posting Date. You can see the dialog window below.


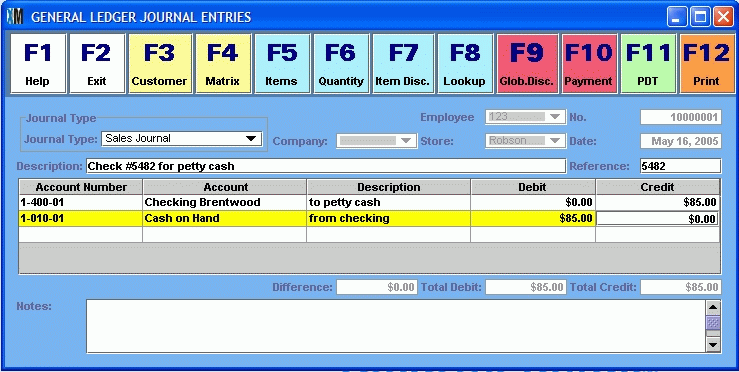
    Once you select the posting date XpertMart will check that the requested month exists in the accounting and is open for posting. If both these conditions exist then the General Ledger Journal Entries window will open like this:


    You select the Journal Type you want to use for this Journal Entry. You can then enter a Description for the entry. In the same way you can enter a Reference number for this Journal Entry. With the F5 key you can begin to enter detail lines on the Journal Entry. To enter an account you can type in the account abreviation or the whole account number.

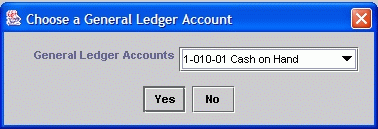
    If you wish you can enter the first few digits of the account number and XpertAccounting (tm) will complete the number if there is only one account number that starts with the digits you typed in. If there is more than one account number that starts with the digits you typed in the you will get an account selector window as shown here:


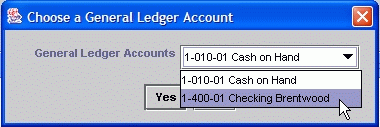
    If you click on the menu you can see what accounts are available for selection as show here.


    You select the account you want to use and click on Yes to put that account on the Journal Entry.

    You can enter as many lines of detail as you wish on the Journal Entry. The difference field will show you if the entry is balanced or not. You can add notes about this Journal Entry in the notes field if you wish.

    Once you are done you click on F12 to print the Journal Entry and apply it.

...continues...