Chapter Topics
Tips for Effective Physical Inventories
Before You Begin the Physical Inventory
Count Sheets
Counting the Merchandise in the
Store
Starting the Physical Inventory
Applying the Physical Counts
Applying the Physical Inventory
Running Physical Inventory Reports
Having Confidence in the Physical Inventory
Doing periodic physical inventories is the essential piece of any effort
to control your inventory. Physical inventories, the process by which retailers
count the physical merchandise in the store and then look to reconcile
it with stock quantities in the system, are the bridge between theory and
reality. No matter how good your inventory control software is, if you
are not periodically conducting physical inventories, the numbers in the
system will be increasingly divorced from reality as time goes on.
The physical inventory process can only be done at a Remote station since, consistent with
the philosophy of inventory control
behind XpertMart™, every store or warehouse is responsible
for its own inventory. By design, managers at the Main cannot intervene at any step of
the physical inventory process since it would then create too many opportunities
for store managers to claim they are not responsible for discrepancies
in stock since part of the process is open to outside intervention.
Tips For Effective Physical Inventories
The physical inventory is nothing more than an audit. In other
words, it cannot prevent robbery or shrinkage; however it can alert you
to the fact that merchandise is missing. As a retail manager, you cannot
be expected to prevent all shrinkage. It is safe to say that it is always
possible that you could lose merchandise to an unscrupulous or incompetent
employee once; but any more than once is the manager's
responsibility because it means she has not set up the right audit systems
to detect this shrinkage. Because it is the ultimate audit tool, it is vital
that you carry out physical inventories in your stores frequently to spot
any problems before they occur again. At a bare minimum, you should
conduct a physical inventory at least once a month, though bi-weekly and
even weekly counts are ideal.
For best results, implement these policies:
1) Conduct closed-door physical inventories. The count will be a lot
more accurate if merchandise is static. Ideally, the physical inventory
can be done at night or in the morning when the store is closed or on days
when the store will be closed anyway (Sundays, holidays, etc.). It is a
lot harder to do a count when you have to keep track of merchandise that
is being sold as you are counting and make the necessary corrections. If
a closed door count is impossible, be sure to schedule the physical inventory
during the day and time with the least customer traffic.
2) All counting should be done by bar code only. Though data can be inputed
into Count Sheets when a bar code tag is not available
by looking up items in the Items Catalog, this makes it easier to cheat.
An unscrupulous employee might remeber that he stole a pair of Nike Airwalks
and two pairs of Reebok DMX running shoes and therefore make sure
to overcount these. However, if you force employees to rely on bar codes,
then it is a lot harder to remember that he must replace one 00234980 and
two 037809700994, and so on.
3) Periodically assign employees from a different store to do the physical
inventory. For example, have the employees of Store #7 do the physical
inventory of Store #13. Where possible, be sure to shuffle these assignements
to avoid any predictable patterns. As paranoid as this sounds, we have
heard too many stories of retailers being robbed by what are essentially
highly organized mafias of unscrupulos employees. We know of one chain
of men's suits that eventually went out of business because they were losing
so much merchandise to employee theft. Whenever there was goin to be a
physical inventory of one store, the manager of that store would call another
store and ask them to transfer to him the merchandise he knew was missing
so that it could be counted. When the physical inventory was done, he would
transfer the merchandise back. This group of employees was able to preemptively
shift inventory between stores just before audits for years. The same suit
was being counted multiple times at different stores. By the time the owners
of the chain found out, it was too late: the y had already lost too much
money to hope to recover.
4) Conduct physical inventories on the day the store manager has off.
It is difficult for employees to be corrupt without the store manager noticing.
Therefore, most of the time when there is organized theft in a store, the
manager is complicit. Carrying out physical inventories when he is not
in the store reduces opportunities for elaborate cheating.
5) When possible, implement surprise audits. Though most of the time
physical inventories will have to be scheduled ahead of time (particularly
if they involve having to close the store and bring in a different team of
employees), it is good to have some unschedule counts since it is
when unscrupulous employees have no time to prepare a cover-up that you are
most likely to detect any theft that might be going on. And, the very threat
of a sudden audit is a powerful deterrent for any employee who might be tempted.
Before You Begin the Physical Inventory
Before you begin the physical inventory, it is essential that you make
a backup of your database (usually C:/Main/Main.gdb) before you
begin the counting and another backup before you
apply the physical inventory. In the event
of a a grave operational error, you will have secured reliable points of
reference to fall back on.
Some retailers who have previously had sloppy inventory control (e.g.
selling items before Receipts are made and they are added to the stock of
the store) and are looking to start again with a clean slate often wonder
if they should drop all existing stock down to zero using Adjustments before proceeding with the physical
inventory. However, this is not necessary. When the physical inventory is
applied the system will automatically make any required Adjustments up or down to get to the stock level
that is actually counted as being on hand. Therefore, bringing stock levels
down to zero is an unnecessary (and time consuming) additional setp.
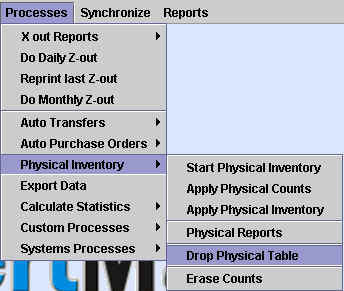
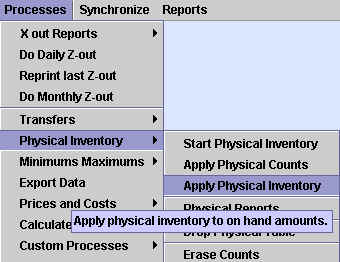
The first step in the physical inventory is to drop the Physical table by entering the Processes>Physical Inventory menu and selecting the Drop Physical table option as shown below:
The Physical Table is a virtual table in the database that stores the data used during the physical inventory process. Dropping or erasing this table will ensure that you do not accidentally include any data from the prior count.
Next, select the Erase Counts option in the Processes>Physical Inventory Menu. This will erase all Count Sheets currently stored in the system. (You can verify this by entering the Documents>Counts catalog and seeing that there are no records there.) This will ensure that you do not accidentally include any previously made Count Sheets in the physical inventory.
Count Sheets
Count sheets are a document that you can use at a Remote station to store
stock quantities without affecting inventory, the Audit Log (Kardex) or the
average cost of that item in the Cost Audit Log. To begin a count, select
the Count option in the Transactions menu.
![]()
A Count is a lot like any other transaction and items can be entered
in the same way: by the item number, by scanning the bar code, by looking
up the item in the Items Catalog, by entering quantities in a style matrix
(activated by pressinf F4) and by downloading data from a Portable Data Terminal
(PDT).
Using a PDT is the fastest and most accurate way to do a physical count
of merchandise. If you have any questions about the compatability of a certain
PDT with XpertMart™, be sure to check with your
Authorized Dealer. Your PDT may have to be programmed to communicate properly
with XpertMart™.
When you are done scanning items into the PDT, connect the PDT to your
computer (using either a cable or communications cradle, depending on the
PDT model) and press F11. You will see a message saying that transmission
is in progress and after a few moments the items you scanned into the PDT
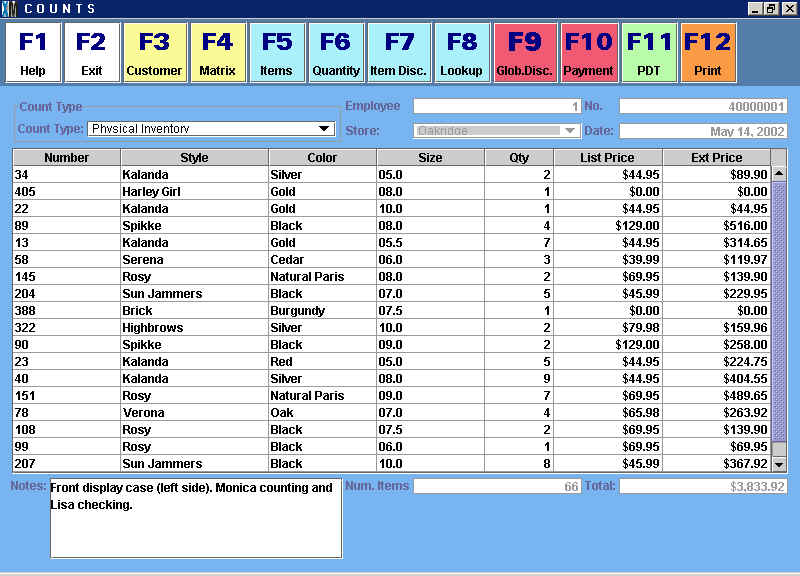
will appear on the Count Sheet. In the example below, 66 items have been
"counted" and enterd into the Count Sheet.
As data is transmitted from the PDT to XpertMart, you might see the following
error:
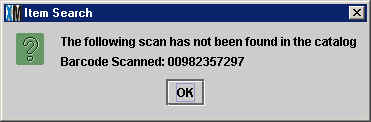
This means that either the PDT read a bar code of an item that has not
been scanned into the EAN/UPC field in the Items Catalog, or that there was
an error reading the bar code and the number somehow got garbled. Be sure
to make a note of which bar code was not found in the catalog to make sure
that the item(s) in question is added to the Count Sheet.
Note that you do not have to group the items by style or arrange the data
in any special way in a Count Sheet. During the physical inventory process,
XpertMart™ adds together all of the Count Sheets and
takes the Net total. So, for example, if you counted one item in one Count
Sheet for the store window, five of the same item on a different Count Sheet
for a store shelf and six more of the item in yet another Count Sheet for
a shelf in the warehouse, XpertMart™ would add all
of these together when you Apply the Physical
Count Sheets and that item would show a stock of 12 (1 + 5 + 6 = 12).
Once you are finished entering data into a Count screen, the Count Sheet
will be stored in the Documents>Counts Catalog. As with any document,
you can print bar code labels for every item listed in the Count Sheet by
pressing the Labels button at the top
of the Catalog toolbar. This way you
can quickly tag any merchandise that is missing bar code labels.
Counting the Merchandise in the Store
The easiest and most efficient way to do a physical inventory
is to divide the store and warehouse into different sections and create
a Count Sheet for each one of those sections. Ideally
you would create a Count Sheet for every piece of furniture (stand, shelf,
display case, etc) in the store and warehouse. When you are finished with
a Count Sheet, you should print it out and post it next to the merchandise
that was just counted. This will allow you to double-check every Count Sheet
by re-counting the physical merchandise and comparing the totals to the
ones posted. It is also a good idea to ask a store supervisor or auditor
to sign at the bottom of every Count Sheet verifying that the totals have
been checked. This redundancy will ensure more accurate results.
If you find that there is a difference between the total shown
on the Count Sheet and the actual physical merchandise, you can create a
second Count Sheet that will correct the difference.
For example, if a piece of merchandise is missing, you can create another
Count Sheet with the additional item. If there is one item too many, you
need to create another Count Sheet that shows a negative (-1) quantity for
that merchandise. XpertMart™
will take net total from the sum of all Count Sheets as its' final count.
Starting the Physical Inventory
There are two objectives behind the Physical Inventory. The first is to
be able to compare what the system has recorded as stock quantities versus
the stock quantities physically counted, and to have a report showing the
differences between the two. The second objective is to adjust the quantities
recorded in the system so that they coincide with those physically counted.
To accomplish these two objectives, XpertMart™
creates the Physical table in the database, which can be seen by opening
the Inventory>Physical Catalog. A sample of the data contained in the
Physical table is shown below:

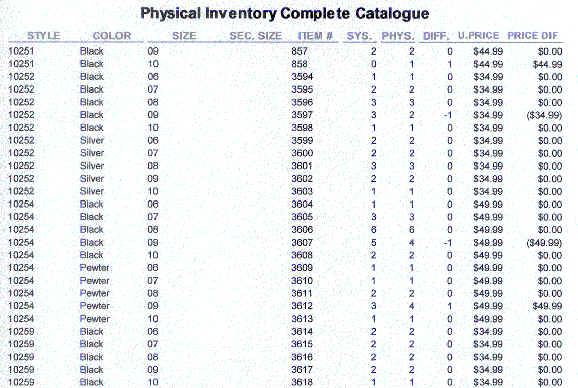
For every item in the database there is a brief description followed by
three columns. The SYS column shows the stock quantity currently recorded
by the system; the PHYS column shows the stock quantity that was counted (by
adding the net totals from all of the Count Sheets);
and the DIFF column displays any difference there might be between these two
columns.
In the example above, for Item #857 the system shows a stock quantity of
2 and the physical count also yielded a stock of 2. Therefore, the difference
between these two is 0. For Item #858, however, the system shows a stock quantity
of 0 but the physsical count yielded a stock of 1. Therefore, the difference
between the two is 1. (Note that when the system quantity is greatere than
the physical quantity the difference is expressed as a negative number).
Before you begin the physical inventory, you will need
to drop the previous Physical table from the database
so you can start from scratch. When you are ready to begin, go the Physical
Inventory menu under Processes in the Main Menu and select Start Physical
Inventory.
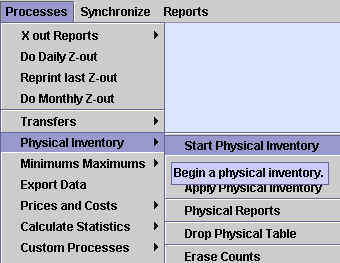
When you select Start Physical Inventory you will see this screen:
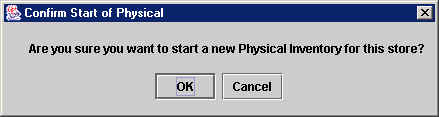
When you press <OK> XpertMart™
will create the Physical table (if you've never created one before) and will
take the current stock quantities in the system and write them to the SYS
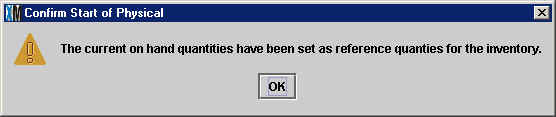
column. Furthermore, XpertMart™ will set the PHYS
and DIFF column to zero. It is important to note that at this point you have
not affected the inventory levels in the system in any way. (That is only
done through Adjustments when you Apply the Physical Inventory). When the system
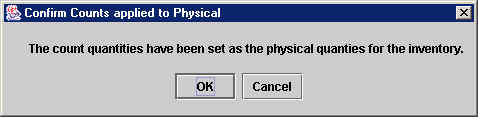
has finished with this step, you will see this screen:
At this point you could run the Physical Inventory Complete Catalog report to verify that the PHYS and DIFF columns are set to zero.
Make sure you only select the Start Physical Inventory option once, as
it "cleans out" all prior data in the Physical table. If you were to select
this option midway through a physical inventory you will need to check every
Count Sheet in the system and may even have to start all over again if they
were erased.
Applying the Physical Counts
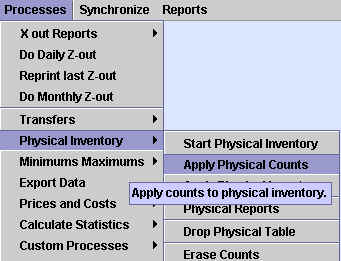
The next step is to apply the Count Sheets. Prior
to this step you should have finished counting all
of the merchandise in the store/warehouse and double-checked the Count
Sheets. When you are ready, select Apply Phsical Counts from the Physical
Inventory menu under Processes.
You will see the following screen:
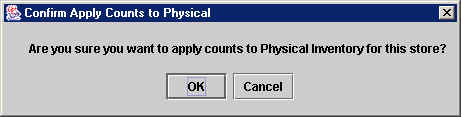
When you press <OK> XpertMart™ will add up all of the quantities in the Count Sheets on file and will write the net total for each item in the PHYS column of the Physical table. At this point, XpertMart™ will also automatically calculate any differences between the SYS and PHYS columns and will write them in the DIFF column. When it is finished, you will see the following message:
Once again you can run the Physical Inventory Complete
Catalog report and verify that the PHYS column is now populated with the
quantities that were counted (whereas before it only displayed zeros). Remember,
at this point you have not affected the inventory levels in the system in
any way.
Look carefully at the DIFF column. Ideally this column would display nothing
but zeros, indicting that there is no difference between the stock quantities
in the system and those that were just counted. However, there will inevitably
be some difference between theory and reality. Your job is, first of all,
see if that difference is do to an operation error: perhaps someone forgot
to enter an invoice or transfer into the system. If this is the case, you
can still enter the missing transaction(s) into the system. When you are finished,
you will need to run the Start Physical Inventory
step again. Do not erase the existing Count Sheets.
If you discover that you are missing Count Sheets
or there is a portion of your store/warehouse you overlooked, you can still
enter new Count Sheets into the system. When you are done entering the additional
Count Sheets, you will need to run the Apply Physical
Counts step again. Once again, do not erase the prior Count Sheets as
they are still valid. Applying the same Count Sheet twice does not duplicate
the stock quantity.
Once you have made sure that there are no missing transactions or Count
Sheets, take a closer look at any remaining items showing a difference between
the SYS and the PHYS columns. This is the merchandise that you have lost,
either through shoplifting, employee theft or incompetence. Any shrinkage
level above 0.5% should be of concern (that's one piece of merchandise lost
for every 1000 passing through the store). These differences can point to
a real problem in your operation and must be looked at carefully. If the missing
items are high-ticket items, that can point to a lack of security. Consult
the Audit Table for each item showing a difference for further clues.
Applying the Physical Inventory
The last step is to Apply the Physical Inventory. This step will replace
the quantities in the SYS column with those in the PHYS column. The way XpertMart™ does this is by creating an Adjustment for every instance where there is a
difference between the system stock and the physical stock to make the former
equal to the latter. This is also keeping with our philosophy of inventory control which
states that all changes to inventory can only be made through a document that
can be audited, in this case, an Adjustment.
Those Adjustments created by the physical inventory process will show up
in the Audit Table as such.
To proceed, select Apply Physical Inventory from the Physical Inventory
menu:
You will see the following screen:
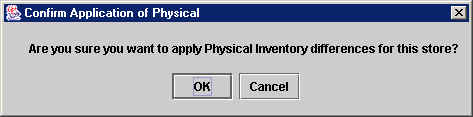
At this point you will affect inventory, so be sure you are ready to proceed.
When you press <OK> the following window will appear:

This window gives you the ability to filter those items that will go through
the physical inventory process. You only need this filter if for some
reason the physical inventory process was interrupted at some point and you
need to pick up where you left off. If this happens, you can enter the Adjustments Catalog and go to the last Adjustment
in there to see which was the last item whose stock quantity as adjusted.
You would then enter this item number in the "For items number larger than:"
field in the window above. In most cases, you just need to have a 0 in that
field and XpertMart™ will
apply the physical inventory to every item in the database.
If you select the checkbox next to the "Print adjustments?" field then
the system will print an Adjustment every time
it creates one (whenever there is a difference between SYS and PHYS). Otherwise,
the Adjustment gets saved to the Adjustements Catalog and you are free to
print them at leisure. Selecting the "Print adjustments?" is only recommended
if you have a high-sped printer; otherwise it slows the process down too much.
When this process is finsihed, the stock levels of every item will be exactly
those that were counted as being on hand.
Running Physical Inventory Reports
During the Physical Inventory process there are several reports that you
can run to help you verify the steps you have taken and to, ultimately, measure
the differences between your stock on hand and the stock reported in the
system. If you select the Physical Reports option in the Processes>Physical
Inventory menu, you will see an XpertReportsRunner™
screen which has a list of those reports you can launch:
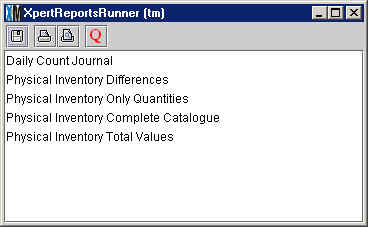
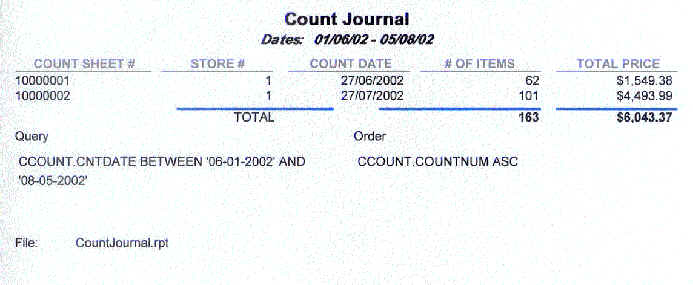
The Count Journal is a report that shows all Count Sheets currently in
the system (for a given date range) and their totals. This report (shown
below) is very useful when you need to keep track of which Count Sheets are
in the system.
The Physical Inventory Complete Catalog reports is basically a display
of the Physical table as it shows, for every item in
the database, the stock in the system (SYS), the stock that was counted (PHYS)
and any difference between the two (DIFF). The quantities in this report
will change as you move through the steps of the physical inventory process.
This report, shown below, is a very powerful diagnostic tool:
The Physical Inventory Differences reports shows only those items where
there is a discrepancy between the system stock and the physical stock, so
it can help you pinpoint any shrinkage problems you may be having. The Physical
Inventory Total Values report is a summary with no detail and will give you
a quick glance at how efficient your store or warehouse is being run.
Having Confidence in the Physical Inventory
There are several steps you can take to verify that the Physical Inventory
was done correctly:
1) You can run the Count Journal report from the Physical Inventory menu.
The sum total of the quantities in the Count Sheets will be the same as the
total of the PHYS column in the Physical table. The contents of the Physical
table can be seen by running the Physical Inventory Complete
Catalog report or you can also check one item at a time by opening the
Physical catalog (in the Catalogs>Inventory menu).
2) You can run the Adjustment Journal report from the Adjustments Catalog
(under Documents in the Main Menu) for the date range covering the time of
the physical inventory. The sum total of the quantities in all of the Adjustments
will equal the total in the DIFF column in the Physical table.
3) Immediately after applying the physical inventory you can redo the
process by once again selecting Start Physical Inventory
and Apply Physical Counts. After running these
two processes, the Physical table should show nothing but zeros in the DIFF
column since the physical quantities should equal the system quantities.
(You should only run this test using a copy of the database).
If any of these three tests fail, then there was a problem with the Physical Inventory and you need to redo the process using, of course, the backup you made before you started.
Copyright © 2002 XpertMart