Setting-Up & Configuring Synchronization
Chapter Topics
Initialize Catalogs
Configure Main Synchronization
Set Catalog Synchronization Dates
Configure Remote Synchronization
Set Document Synchronization Dates
Sync Stores Catalog
Regenerate Documents
Initialize Catalogs
The previous chapter described how the
Synchronization process
works and described how XpertMart™
uses dates
to decide what data is new and needs to be sent between the Main
and the Remote stations. However, this explanation assumes that the synchronization
is up and running--i.e. during the synchronization the system is explicitly
not send all of the catalogs and documents back and forth, only data that
has changed.
The very first time that the synchronization takes place, however, you do
want the entire database (at least the Catalogs portion) sent from
the Main to the Remote. Presumably the Catalogs have been filled in at the
Main and need to be sent out to the Remote stations for the first time. There
is a special process to do just that, the Initialize Catalogs process:
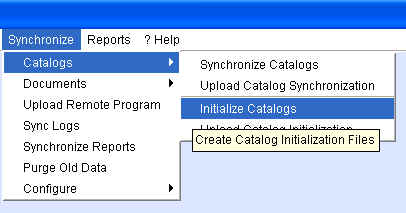
Running the Initialize Catalogs process will create synchronization files
in the C:/Main/Out folder that contain the entire contents of the catalogs.
One file will be created for every catalog. Unlike normal catalog
synchronization files
that end with either a .xfn or .xtm extension, the files
created through Initialization end with a .xin extension.
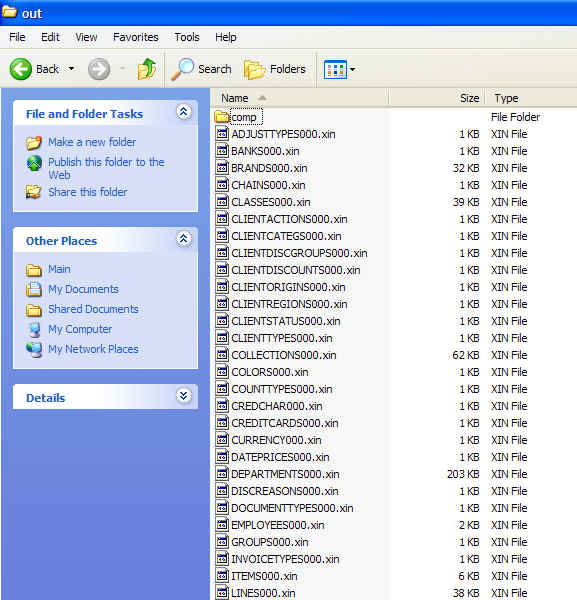
These .xin files, unlike the normal catalog synchronization files,
do not have a date as part of their name. Compare for example the BRANDS00020030504.xfn
file with the BRANDS000.xin file. The former contains only new data
created or modified on May 4, 2003 whereas the latter contains all data in
the Brands Catalog. All .xin files are therefore, larger in size than
.xfn or .xtm files.
Because Initialization files are larger, the synchronization cycle will
take a lot longer. Uploading, downloading and processing these files may
take 30-60 minutes for each step. It is precisely for this reason that after
you've synchronized the Catalog Initialization you should then run the
Catalog Synchronization
process thereafter. There is no harm in Initializing Catalogs more than
once and synching them out to the stores; the data will not duplicate, but
the process is unnecesarily slow compared to the normal
synchronization cycle
.
Once the .xin files have have been created and are in the Out folder,
these can be uploaded to the FTP Server
by going to Synchronize>Catalogs>Upload Catalog Initialization. This
process works the same way that
Upload Catalog Synchronization
does.
Similarly, the .xin files are dowloaded at the Remote by running
the Synchronize>Catalogs>Download Catalog Initialization process. This
process works the same way that the
Download Catalog Synchronization
does.
Once the .xin files have been downloaded to the C:/Main/In folder at the
Remote, they can be process by going to the Synchronize>Intialize Catalogs.
This process works the same way that the
Catalog Synchronization
process does.
The Catalogs that were originally created at the Main are now visible at
the Remote and can be used to run transactions.
Configure Main Synchronization
Once Catalogs have been Initialized and synched-out to the stores, you should
begin to Synchronize Catalogs
regularly. As was discussed in the previous
chapter
, synchronization is based on the system comparing the date of the last
synchronization to the date of the synchronization files that are downloaded
and processed.
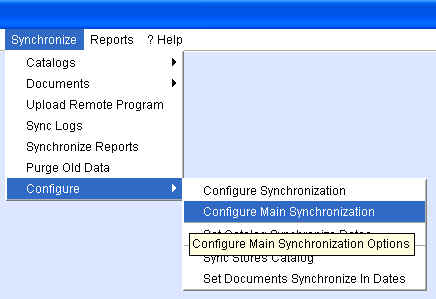
The date of the last synchronization is stored in the system and is visible
by going to the Synchronize>Configure>Configure Main Synchronization
menu:
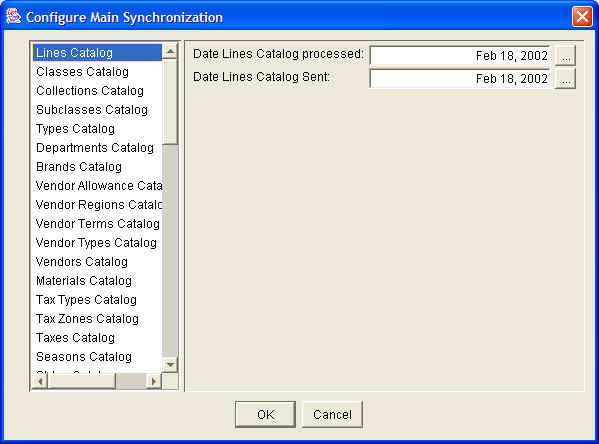
This will open a window that lists every Catalog on the left and, on the
right side, the date the Catalog was synchronized or processed and the date
the Catalog was sent or uploaded to the FTP. In the example below, the Lines
Catalog was synchronized and uploaded on February 18, 2002.
This means that the next time you run the
Synchronize Catalogs
process, the system will look for every field in the Lines Catalog whose
DLM (Date Last Modified)
is on or after February 18, 2002. Any modification made to the Lines Catalog
prior to February 18, 2002 is assumed to have already been synchronized out
to the stores.
When you run the Initialize Catalogs
process, the date of the initialization will automatically be written into
the Configure Main Synchronization window for every Catalog appearing on the
left side. The dates in the window get updated every time Catalogs are
successfully synchronized and uploaded.
The Configure Main Synchronization window can also be used to change the
date of last synchronization for a particular catalog. The browse buttons
the left of the two date fields opens up the XpertDate
™ tool
which you can use to change the date. If you change the Date Lines Catalog
Processed to February 15, 2002 and you next Synchronize Catalogs on February
19, 2002 it will create .xfn synchronization files for February 15,
16, 17, 18 and a .xtm synchronizaiton file for the 19th for the Lines
Catalog whereas for every other Catalog it will only create an .xfn file for
February 18 and a .xtm file for the 19th.
If you want to change the date of last synchronization for every catalog
at once, use the Set Catalog Synchronization dates process.
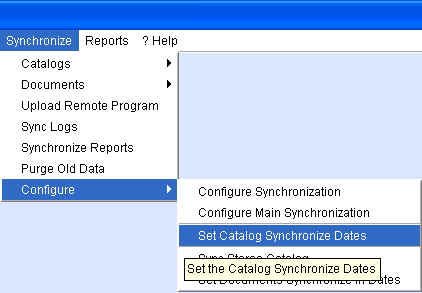
Set Catalog Synchronization Dates
To run this process, go to Synchronize>Configure>Set Catalog Synchronization
Dates:
This will open a small window that lets you input a new date using the
XpertDate™ tool
.

The next time you open the Configure Main Synchronization window you will
see the new date you set for every catalog. You can then modify the dates
of individual catalogs if necessary.
The Set Catalog Synchronization Dates can also be used at the Remote. Whereas
this feature is used at the Main to tell the system which files it needs to
"send" (synchronize and upload), this feature is used at the Remote to tell
the system which files it needs to "receive" (download and synchronize).
IMPORTANT NOTE: The "send" and "receive" synchronization dates must match.
XpertMart™ will not process a synchronization
file file if it doesn't first process the synchronization file of the immediately
preceeding date.
For example: suppose that at the Main synchronizaiton files are created
for May 1, May 2, May 3 and May 4. The PRICES00002002501.xfn file sets the
price of a certain item at $45 because it is on sale. However, the PRICES00020020503.xfn
file sets the price at $55 because by May 5th the sale is over. If XpertMart
™ processed synchronization files out of order, it might
first process the PRICES00020020503.xfn file (setting the price at $55) and
then process the PRICES00002002501.xfn setting the price, incorrectly, at
$45. Therefore, XpertMart™ will always process
synchronization files chronologically and will stop any time there it does
not find a file for the immediate next day.
If you suspect that modifications to certain catalogs have not been sent
or received by the stores, you can use the Set Catalog Synchronization Dates
feature to rectify the problem. See the
Monitoring & Troubleshooting the Synchronization
chapter for more details.
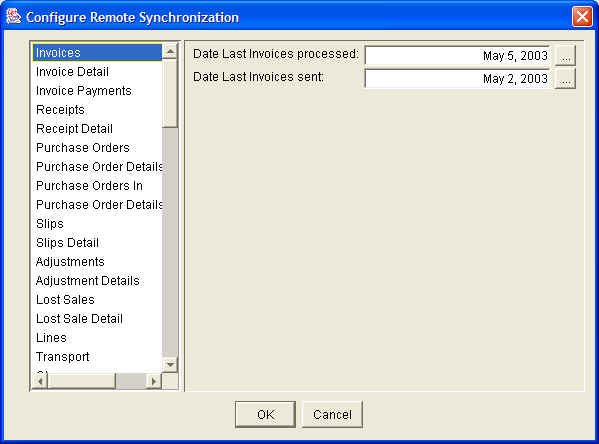
Configure Remote Synchronization
As with Catalogs, XpertMart™ records the last
date that Documents were synchronized and sent out. At a Remote station these
dates can be consulted by going to Synchronize>Configure>Configure Remote
Synchronization:

This will open a window that displays every Document type. (As discussed
in the Synchronize Documents section
of the previous chapter, each document type is actually snchronized in
parts: the document header, the document detail and, in the case of Invoices,
the document footer with payment date). On the right side, the last date
Documents were synchronized and uploaded is displayed.
In the example below, Invoices were last synchronized on May 5, 2003. However,
the last time these were uploaded to the FTP Server was May 2, 2003. This
tells us that there are some document synchronization files that are sitting
in the C:/Main/Out folder that have not yet been uploaded.
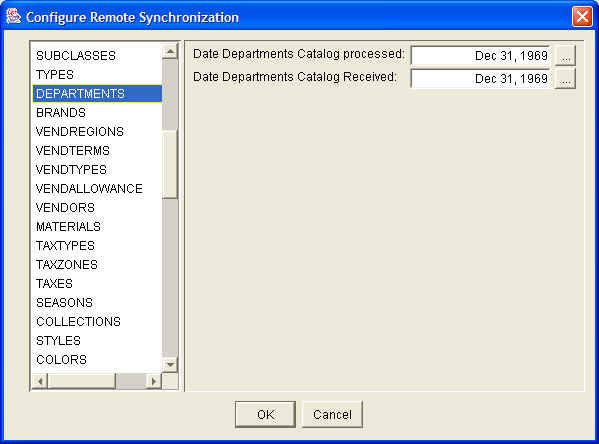
The Configure Remote Synchronization window also shows the last time every
Catalog was successfully downloaded or received and the last date each catalog
was synchronized or processed. The Catalogs appear on the left side below
the Document types. In the example below, the Departments Catalog has not
yet been received. (The default date the system writes into these date fields
is December 31, 1969).
The date of last synchronization for any Document type or Catalog can be
changed by clicking on the browse buttons to the right of the two date fields.
If you want to change the synchronization dates of all documents, use the
Set Documents Synchronize Dates function.
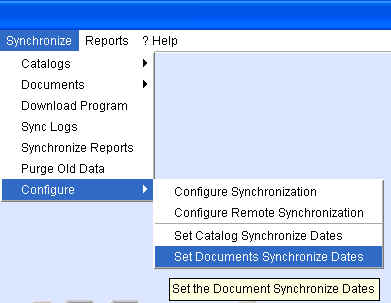
Set Document Synchronize Dates
The Set Document Synchronize Dates function is run at the Remote by going
to Synchronize>Configure>Set Documents Synchronize Dates:
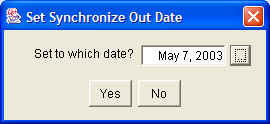
This will open a small window that lets you input a new date using the
XpertDate™ tool
. The synchronization dates for every document will be set to the date you
input into this window. This will tell the system from which point forward
it should "send" documents out to the Main.
The new date is now visible at the Configure Remote Synchronization window
.
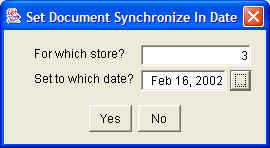
The same process can be run at the Main, only this time you are telling
the system from which point forward it should "receive" documents from a
Remote. When you run this feature from a Main it will ask you to specify
the store. The synchronization dates of each store are configured individually.
Sync Stores Catalog
Because the Main is receiving transaction data from more than one Remote,
information about the last synchronization date for documents is stored
in a catalog where multiple records or stores can be stored and viewed. This
is the Sync Stores Catalog which can be opened by going to Synchronize>Configure>Sync
Stores Catalog.
The Sync Stores Catalog functions like any Catalog
: it has the same Toolbar
at the top and the Records Bar
at the bottom right-hand corner displays the total number of entries in
the catalog. There should be one entry in the Sync Stores Catalog for every
store in the chain.
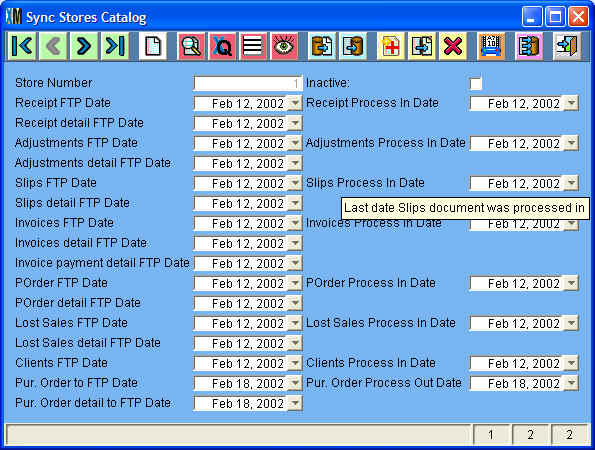
At the top of the Catalog you can see the Store Number you are looking at
and a checkbox that shows whether it is inactive. If a store is Inactive it
will neither send out document data or receive catalog data.
The rest of the Sync Stors Catalog is divided into two halves. The left
side shows the last date that document synchronization files were downloaded
from the FTP
. The right side shows the last date Document types were processed or synchronized
in.
In the example above, the three synchronization files that make up Invoice
data (Invoies, Invoice detail and Invoice payment detail) were all downloaded
from the FTP on February 12, 2002. These files were then used to synchronize
Invoices on the same date. Purchase Orders were successfully synchronized
on February 18, 2002.
The dates that appear in the Sync Stores Catalog can all be modified by
pressing the button to the right of the date field. The Sync Stores Catalog
is therefore a very important tool used to
monitor and troubleshoot
the synchronization process.
Regenerate Documents
If you discover that transaction data from a certain dates has not made
it to the Main, you can always change the synchronization dates using the
Set Document Synchronization Dates
process. Perhaps an even easier method, however, is to use the Regenerate
Documents process.
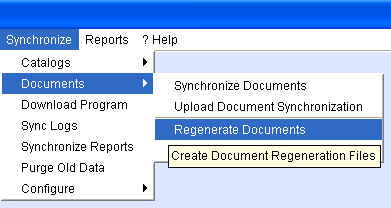
This process will open a window that lets you enter a date range for which
XpertMart™ will create document synchronization
files and place them in the C:/Main/Out folder.
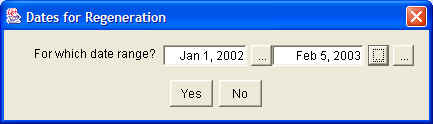
In the example above, the system will create document synchronization files
for every day from January 1, 2002 to February 5, 2003. You must then upload
them to the FTP Server.
The Regenerate Documents function is a useful tool if you want to "play
it safe" and make sure that all of the transactions from a certain date have
been properly synchronized. Regenerating Documents is akin to a "do-over".
If you Download and Process Document Regeneration at the Main you will replace
the document data you previously had (for that store) with the new files you
created.
Copyright © 2004 Dinari Systems LLC