Synchronization
Chapter Topics
Introduction to Synchronization
Date Last Modified
Using an FTP Server
Configure Synchronization
Overview of the Synchronization Cycle
Synchronize Documents
Upload Document Synchronization
Download Document Synchronization
Process Document Synchronization
Synchronize Catalogs
Upload Catalog Synchronization
Download Catalog Synchronization
Process Catalog Synchronization
Introduction to Synchronization
When you are operating in a multi-location environment your
database can be said to be a "distributed database" since the data is distributed
among the different locations. Users at any station (be it the Main, a store
or a warehouse) see their part of the database live, with every change immediately
updated, but the other parts of the database are snapshots at a given point
in time and do not reflect the latest information. The longer it's been
since the last snapshot of the database was taken, the less relevant it
becomes.
Therefore, the many parts of the distributed database need to be regularly
"synchronized" to be kept current. The Synchronization process in XpertMart
™ (often called polling by other systems) is used to
transmit information between the Main
station
and the Remote stations
so that they are all kept as up to date as possible.
This chapter will provide an overview of the Synchronization process
as well as explain how to do a synchronization cycle manually. A subsequent
chapter will discuss how to Automate
the Synchronization Process Using the Scheduler
. Other chapters will explain how to
Configure the Synchronization
, how to Add a New Store to the Database
and how to Monitor and
Troubleshoot the Synchronization
.
Date Last Modified
It would be unnecessarily burdensome for the Remotes to send
al of their Documents
and for the Main to send over every
Catalog
every time there was a Syncrhonization. The large size of the files
being trasnmitted would slow the process down. To be more efficient, XpertMart
™ only synchronizes information that is new or that has
changed.
Every table in the database has a Date Last Modified or DLM field attached
to it. (The DLM is not visible to the end-user but is read automatically
by the system). The date of the last change made to the table. If you add
a new vendor to the Vendors Catalog on May 3, 2003 then the DLM for the
Vendors table in the database would be 20030503. Likewise if you change
the price of one of your styles in styles catalog on May 1, 2003 then the
DLM for the Styles table in the database would be 20030501.
Every time XpertMart™ succesfully completes
a synchronization cycle
it records the date of the synchronization. The next time it does
a synchronization XpertMart™ looks for
any file whose DLM comes after the date of the last synchronization.
Suppose a synchronization was done on May 2, 2003. When a synchronization
takes place the following day, the system knows it needs to synchronize
the Vendors Catalog because the DLM (May 3, 2003) comes after the last synchornization
(May 2, 2003) so the information is new. However, the system knows it can
safely skip sending the Styles Catalog because the DLM (May 1, 2003) comes
before the date of the last synchronization (May 2, 2003) so the information
has already been updated at every location.
Using an FTP Server
XpertMart™ uses an FTP Server
to handle the sending and receiving of files between the Main station and
the Remote stations. This is a vast improvement over older systems that used
one-to-one polling to send and receive data. The FTP Server (FTP stands File
Transfer Protocol) can be thought of functioning as a virtual mailbox. The
Main can connect to the server and deposit its files there without any of
the Remote stations having to be connected to the server. Each Remote can
then access the server (at different times), download the files left there
by the Main and upload their own files. The Main does not have to be connected
to the server when the Remote stations are.
Using an FTP server affords us several important advantages:
1) The communication cycle is more efficient. If there are 30 Remote
stations, the Main does not have to go through 30 individual polling sessions
with each Remote but instead "broadcasts" its data once to the server.
2) Because the communication cycle is more efficient, it is less prone
to error. Under one-to-one polling the Main and the Remot have to be both
connected at the same time. If there is a problem on either side, the communication
cycle is broken and data is not updated. So in a 30 store chain there are
60 polling pairings that need to be successful for all data to be updated.
That multiplies the probability of something going wrong.
3) As a result of the communication process being more efficient, computers
are online less frequently, minimizing their exposure to viruses and hacker
attacks. The less exposed your system and data are to the outside world,
the better.
4) Each store retains its own data. Remote stations are not dependent
on a continuous live connection to the Internet for their data. If the connection
to the server is lost, stores have their own database and can continue
selling offline. There is no risk of catastrophic downtime.
5) On the other hand, the synchronization can be
configured
to take place as often as once every hour. So you have the best of both
world: data can be kept up-to-date (only 1 hour old) but you are not dependent
on a continuous connection to the Internet.
Configure Synchronization
Before you get started syncrhonizing data, the basic configuration needs
to be setup. This is done by going to the Synchronize>Configure>Configure
Synchronization menu.

To begin, Synchronization Directories need to be specified. These are
the folders where the system places files that need to be sent out and files
that are coming in and need to be processed. These directories are intermediary
clearinghouses for data. By default, XpertMart™
uses the "Out" folder in the C:/Main directory for outgoing fiels and
the "In" folder for incoming files.
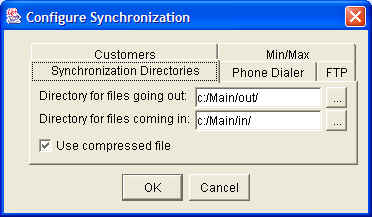
If you select the "Use compresed file" checkbox the file size will be reduced
and the process sped-up. IMPORTANT NOTE: If you choose to use compressed
files at the Main then you must use compressed files at the Remote
(and vice-versa). Otherwise the Main will upload compressed files and the
Remote will not be looking to download compressed files and the synchronization
will fail.
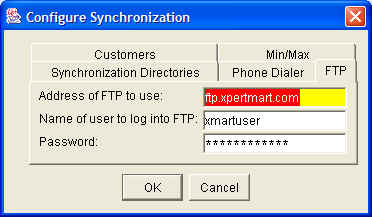
The next step is to specify the FTP Server
that is going to be used for the synchronization. Enter the address of
the FTP, the user name and the Password. The address of the FTP Server can
be a URL, a DNS address or, if you are using a local server, the name of
the server.
If your computer has a broadband or network connection to the Internet,
XpertMart ™ will automatically access the
FTP Server you specify during the synchronization cycle. If you do not have
a dedicated Internet connection you will need to specify the Phone Dialer
you will use to access the FTP Server.
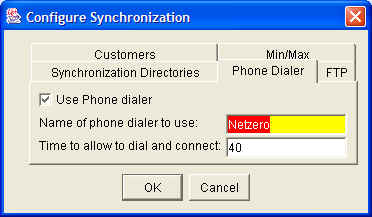
To use the Phone Dialer select the checkbox and specify the name of the
dial-up connection you want to use. The name must match exactly the name
of a dial-up connection you have previously setup on that computer. You can
modify the alloted time to dial and connect before the system hangs up and
tries again.
The Configure Synchronization menu also lets you decide whether Minimums
and Maximums as well as Customer data will be synchronized back and forth
in addition to Documents and Catalogs.
Overview of the Synchronization Cycle
There are eight steps to a complete synchronization cycle.
These are summarized in the diagram below.
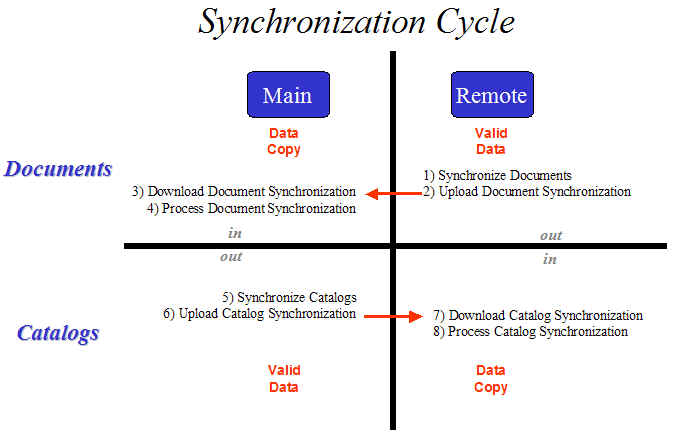
The first step is for the Remote stations to Synchronize
Documents
. During this step the system looks for all Documents (Invoices, Receipts,
etc.) that have been modified or created since the last synchronization by
comparing the DLMs
of every file with the date of last synchronization. The files that need
to be sent to the Main are placed in the C:/Main/Out folder as specified
in the configuration
.
The second step is Upload Document Synchronization
. During this step the system takes all files in the C:/Main/Out folder
and uploads them to the FTP Server
. The files are now sitting on the server where they can be downloaded
at any time.
The third step is for the Main to Download Document
Synchronization
. During this step the system downloads all document files on the FTP
Server and puts them in the C:/Main/In folder.
The fourth step is for the Main to Process Document
Synchronization
. During this step the system compares every Document file to the files
in the C:/Main/In folder and updates all Documents files accordingly. All
new Documents (Invoices, Receipts, etc.) are imported into the respective
Documents Catalog.
Note that the Documents residing at the Main are merely copies
of the real Documents. From a philosopy of design perspective, the valid
Documents are considered to reside at the Remote. Should there ever be a
problem during the synchronization process that requires resending Documents,
the point of reference will always be the Remote.
At this point the Synchronization cycle is half complete. The Main now
has up-to-date transaction data from every store, but the stores have not
yet received the latest changes to Catalogs (e.g. price changes, new styles,
etc.).
Step Five is for the Main to Synchronize Catalogs
. During this step the system looks for all Catalogs that have been modified
or created since the last synchronization by comparing the DLMs of every
file with the date of the last synchronization. The files that need to be
sent to the Remotes are placed in the C:/Main/Out folder.
During the next step, Upload Catalog Synchronization
, the files in the C:/Main/Out folder are uploaded to the FTP Server.
The seventh step is for the Remotes to Download
Catalog Synchronization
. During this step the system imports all catalog files and places them
in the C:/Main/In folder.
The final step, Process Catalog Synchronization
, is when the system compares every Catalog file to the files in the C:/Main/In
folder and updates all Catalogs accordingly.
The synchronization cycle is now complete. The Main has received all Document
updates and the Remotes have received all Catalog updates. The rest of this
chapter explains how to carry out each of these eight steps in XpertMart
™ manually. The next chapter explains how to use the Scheduler
to have all eight steps take place automatically at scheduled times.
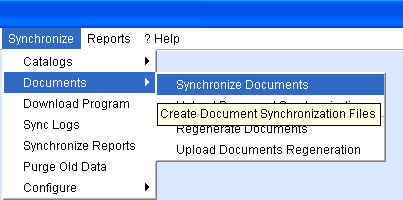
Synchronize Documents
To manually synchronize documents at a Remote, go to Synchronize>Documents>Synchronize
Documents as shown below.
XpertMart™ will begin an automatic process
that will create files for every document type for every date since the last
synchronizaiton date. As this process is underway you will the the system
go through every document type. In the example below, the system is creating
the synchronization files for Invoices.

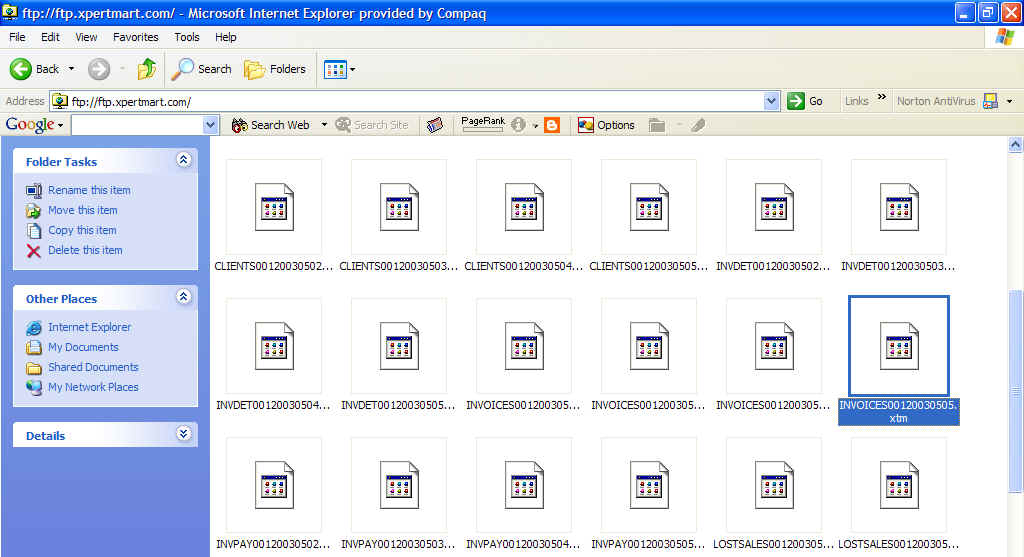
Once the system is done, you can open the C:/Main/Out folder and view
the contents. In the example below, the last synchronization was done on
May 2, 2003 and the current synchronization is being done on May 5, 2003:

A file is created for each date since the last synchronization even if
there were no changes or modifications (the file will be 1kb in size and
is essentially empty). For most Document types two files are actually created,
one with general information about the transaction and the other with the
actual details of which items are affected by the transaction. For invoices
there is a third file created that has all of the payment information.
So in the case of Invoices of May 5, 2003 the following three files were
created:
INVOICES00120030503.xfn = data from the Invoice
header including employee logged in, invoice number, and invoice type
INVDET00120030503.xfn = data from the items
area including quantity, price and discounts
INVPAY00120030503.xfn = data form the payments
footer including tender types
The numbers in the file name tell the system the store number the file
is originating from and the date. Invoices00120030503.xfn indicates the file
corresponds to data from Store 1, May 5, 2003. Invoices01720021123.xfn indicates
the file contains data from Store 17's sales on November 23, 2002.
The .xfn extension indicates that the data being sent for that particular
date is final. A .xtm extension indicates that the data is temporary. The
file created for the day the synchronization is taking place will always
be a temporary (.xtm) file because it's possible that changes might be made
to the at the Remote even after the synchronization takes place. For example,
the synchronization might take place at 8:00 p.m. but an hour later the store
manager notices a pile of receipts that were not inputted into the system.
Those changes take place after the synchronization has taken place. A user
at the Main will get a snapshot of the days sales but the system knows that
the final data for the day will not be send until the next synchronization
when it will replace the .xtm file with the .xfn file.
In the example above, the synchronization is taking place on May 5, 2003
so the Invoices00120030505.xtm is a temporary file.
You do not need to concern yourself with how XpertMart
™ takes these synchronization files and then assembles
transaction data from them. It is useful, however, to understand the files
that are created during the synchronization process so that if there is ever
a communication failure (e.g. a power outage or computer mistakenly left
offline) you know enough to do some detective work and figure out which files
were sent or not sent. A later chapter will explain how to
manipulate synchronization dates to troubleshoot
these typs of problem.
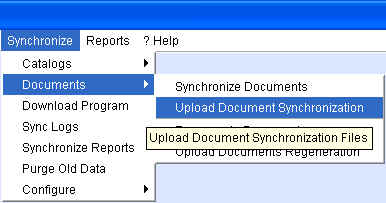
Upload Document Synchronization
To manually upload the synchronized document files to the FTP
Server go to Synchrnoize>Documents>Upload Document Synchronization:
XpertMart™ will take all of the files in
the C:/Main/Out folder and upload them to the FTP Server
you specified in the configuration
. When the process is done, you will be able to see that the files are
now residing on the FTP Server.
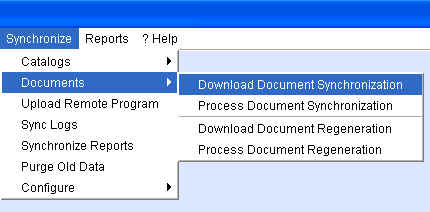
Download Document Synchronization
To download the files on the FTP Server the remotes have uploaded, go
to Synchronize>Documents>Download Document Synchronization at the
Main:
XpertMart™ will access the FTP Server and
download all of the files into the C:/Main/In directory. When the process
is done, you will be able to see the files in your hard drive:
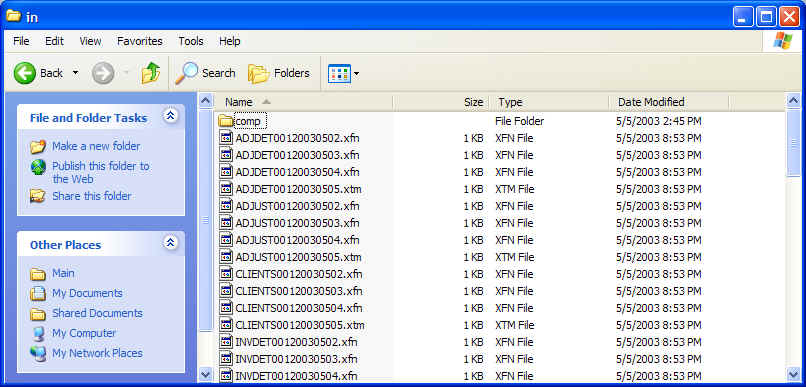
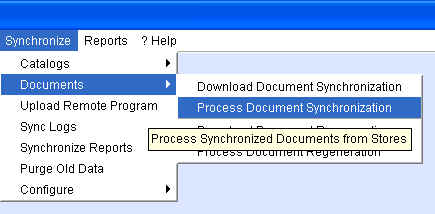
Process Document Synchronization
To process the document synchronization files that are in the C:/Main/In
directory, go to Synchronize>Documents>Process Document Synchronization:
XpertMart™ will begin an automatic process
that will check every Documents Catalog against the synchronization files
in the In folder looking for any new data. As this process is underway you
will the the system go through every document type. You may also notice
that the system is also processing the Client Catalog. Since customer data
is obtained at the Remotes, it is the one catalog that is also synchronized
along with documents form the Remote stations to the Main.

When the process is finished, all transaction data in the Documents catalogs
should be up to date.
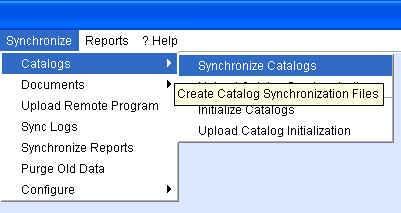
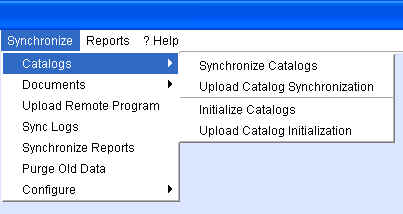
Synchronize Catalogs
To manually synchronize catalogs at the Main, go to Synchronize>Catalogs>Synchronize
Catalogs as shown below.
XpertMart™ will begin an automatic process
that will create a file for every catalog for every date since the last
synchronizaiton date. As this process is underway you will the the system
go through every catalog. In the example below, the system is creating the
synchronization files for the Stores Catalog.

Once the system is done, you can open the C:/Main/Out folder and view
the contents. The result is similar to that of the Synchronize
Documents
process.
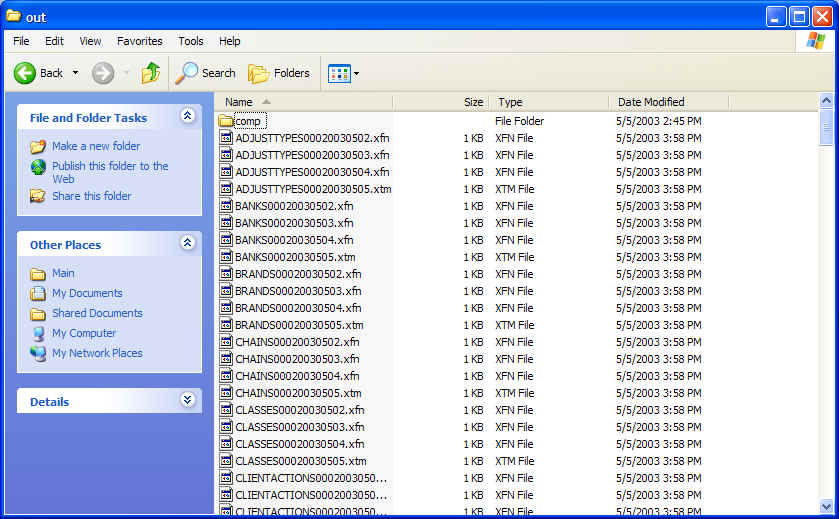
Once again a file is created for every day since the last synchronization.
The BRANDS00020030504.xfn contains data modified or created in the
Brands Catalog on May 4, 2003. The 000 before the date indicates that the
file was created by the Main station (which is internally assigned store
number 000) and the .xfn extension indicates that it is the final file
created for that date. The CLASSES00020030505.xtm file contains preliminary
data that was modified or created in the Classes Catalog at the Main and
will be replaced by an .xfn file during the next synchroniztion.
You might notice that in addition to catalog files there are also synchronization
files for Purchase Orders as these are the one transaction that can also
be made at the Main station.
Upload Catalog Synchronization
To manually upload the synchronized catalog files to the FTP
Server go to Synchrnoize>Catalogs>Upload Catalog Synchronization:
XpertMart™ will take all of the files in
the C:/Main/Out folder and upload them to the FTP Server
you specified in the configuration
. When the process is done, you will be able to see that the catalog synchronization
files are now residing on the FTP Server.
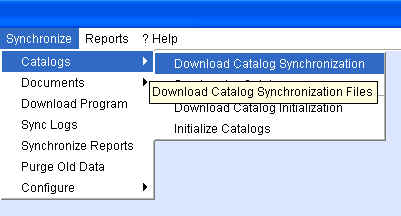
Download Catalog Synchronization
To download the files on the FTP Server the remotes have uploaded,
go to Synchronize>Catalogs>Download Catalog Synchronization at each
Remote:
XpertMart™ will access the FTP Server and
download all of the files into the C:/Main/In directory. When the process
is done, you will be able to see the catalog synchronization files in your
hard drive.
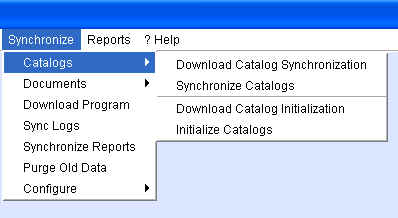
Process Catalog Synchronization
To process the catalog synchronization files that are in the
C:/Main/In directory, go to Synchronize>Catalogs>Synchronize Catalogs:
XpertMart™ will begin an automatic process
that will check every Catalog against the synchronization files in the In
folder looking for any new data. As this process is underway you will the
the system go through every Catalog on screen. When the process is finished,
all data in the Catalogs should be up to date. The synchronization process
is now complete.
Copyright © 2004 Dinari Systems LLC