Chapter Topics
General Considerations
Configuring the Main
File Configure
Configure Inventory
Store Configure
Station Configure
Configure Colors
Add a Store
General
Considerations
To optimize the speed of the system many of the configuration settings are
saved in external files with a .ini extension, which means that you must
close and restart XpertMart™ for changes to
take effect. Another important implication is that these configuration settings
are therefore saved separate from the database. Therefore, if you transport
the database to another computer you must also copy these .ini files or many
of the configuration settings will be lost.
Anytime you have one of the configuration menus open you can not execute any other tasks on XpertMart™ until the configuration menu has been closed. If for some reason you lose sight of the configuration window and you try to navigate other menus the program will behave as if it had frozen up. If this happens, press <ALT+Tab> to return to the configuration window and close it.
Configuring the Main
The configuration options are mostly similar for a Main or a Remote, but there are some important
differences, which will be noted in the next chapter, Configuring XpertMart™
at the Remote.
There are 9 submenus that appear in the Configure Menu at the Main in the main menu, as shown below:
Four of these submenus are covered in depth in other sections of the User's Manual. Schedule is covered in the synchronization process and Configure Security is part of the security topic. Station Configure and Configure Documents are treated in the next chapter, Configuring XpertMart™ at the Remote. The rest are treated below.
File Configure
You use this submenu to define broad configuration settings about the kind
of information you want to store, where it will be stored and how it will
be retrieved. This menu has 10 tabs as shown below:
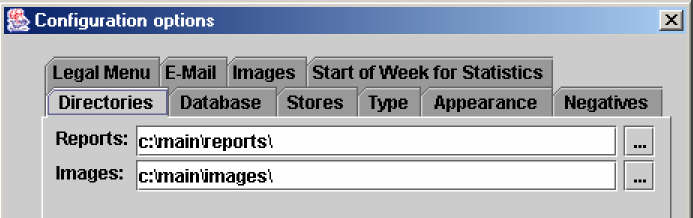
Tab 1: Directories
In this submenu the directory that contains the reports is specified. The
location of this directory may be changed, however its name “reports” can
not be altered since the system will always look for this directory to find
the reports. The directory that
contains the images to be imported into XpertMart™
is also specified in this sub menu. Note that once an image has been saved
in XpertMart™ it becomes part of the database
file (Main.gdb) and can then be
deleted from this directory, if so desired.
The button ![]() to the right of each field can be used to browse the contents of the
computer to select the desired directory, instead of typing the path directly
into the field.
to the right of each field can be used to browse the contents of the
computer to select the desired directory, instead of typing the path directly
into the field.
Tab 2: Database
XpertMart™ can run on a variety of database managers,
such as Interbase, Oracle, Informix and use different databases. This tab
is used to specify the database that XpertMart™ will
use. Once the database has been specified it will become the default database
every time you launch XpertMart™ unless you specify
otherwise.
As shown in the image below, there are 5 fields you must define to specify the database.
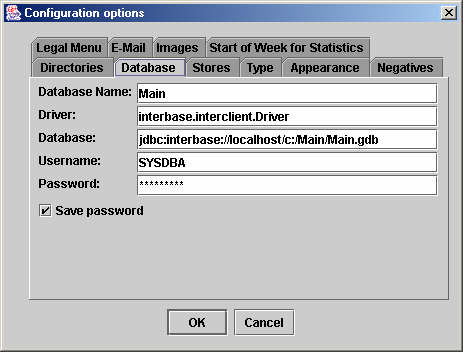
Field 1: Database Name
Specifies the name you assign to your database to make
it easier to remember. In this case the database is simply
called Main.
Field 2: Driver
Specifies which database manager you will be using and
its driver, in this case the Database Manager being used is
InterBase.
Field 3: Database
Specifies the path to the actual database file. In this
case the database being used is Main.gdb and it resides on the C:\Main
directory on the local computer. JDBC shows that the database
being used complies with the Java ODBC standard.
IMPORTANT NOTE: Before making any changes to this path
be sure to write it down, exactly as it appears (copying and
pasting to a text path is highly recommended) since there
is no way to recover it once you have begun overwriting it.
Field 4: User Name
Specifies the name of the user who will access the database.
NOTE that prior to configuring this database in XpertMart™,
the user name and password must have been created in the database
manager.
Field 5: Password
Should be the same password that was used when the user
name was created in the database manager,
in this case
InterBase.
Tab 3: Stores
This screen is merely informative and can not be edited. The number of stores
shown is read directly from the database. In the example shown below, there
are 27 stores in the database.
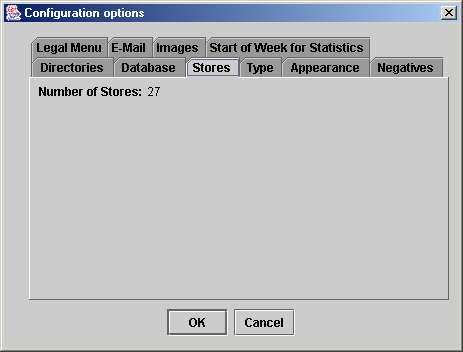
IMPORTANT NOTE: Make sure there is an entry in the Stores Catalog for every store that has been created in the database. Otherwise, XpertMart™ will not function properly.
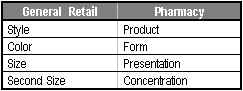
Tab 4: Type
In this tab you have the option of changing the database type to Pharmacy
by selecting the checkbox. The default database type (no check box selected)
is General Retail and displays stock, sales and other important information
in a Style/Size/SecondSize/Color matrix. This database type is particularly
useful for shoes and clothing retailers.

The Pharmacy database type displays stock, sales and other important information in a Product/Form/Presentation/Concentration matrix and is particularly useful for pharmacies, cosmetics and perishable goods retailers.
The difference types of matrices are summarized in the table below.
IMPORTANT NOTE: The decision of which database type to use should be made before you start entering data into the database. Once you define the database type and begin using it, you should not change the database type.
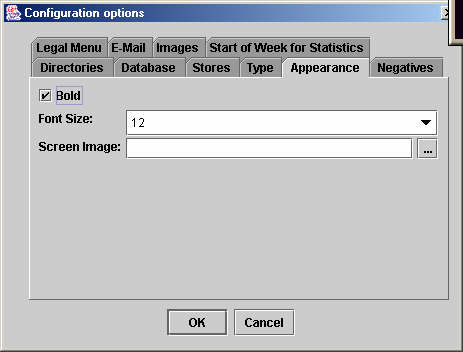
Tab 5: Appearance
In this tab, you can define the way information is displayed in an XpertMart™ window. You can select the font size from the drop down
menu and define whether the text will appear in bold (using font size 12,
bold is recommended). These settings apply to every window displayed in XpertMart™.
Java is generally very flexible at adapting the size of windows and other objects to the text size you have defined. However, sometimes text may be truncated. When this happens, the truncated text will be followed by two or more periods, for example the word “Analyze” might appear as “Ana…” in cases where a very large font is selected. Be sure to test each new setting as it may not be appropriate depending on the size of your monitor and its display capabilities.
NOTE: You must exit the program every time you change a configuration for it to take effect.
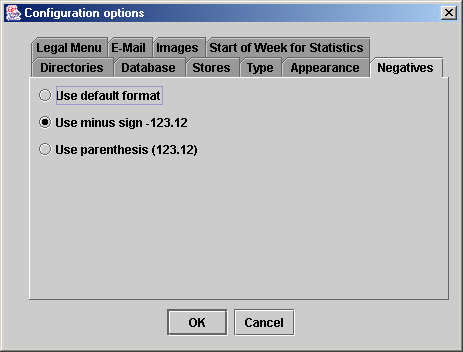
Tab 6: Negatives
In this submenu you can define how negative quantities are displayed. XpertMart™ displays negatives in one of two ways: with a negative
sign in front of the numbers or by putting a parenthesis all negative quantities.
The default format is selected by Java based on the Operating System's regional
settings on the computer you are running. Java uses the minus sign for some
countries and the parenthesis for the rest. If you don't like the format
Java has chosen, you can override it by manually selecting the other option
in this tab. In the example below, Java's default format for the user's regional
setting is to use parenthesis but the user has instead chosen to express
negatives with a minus sign.
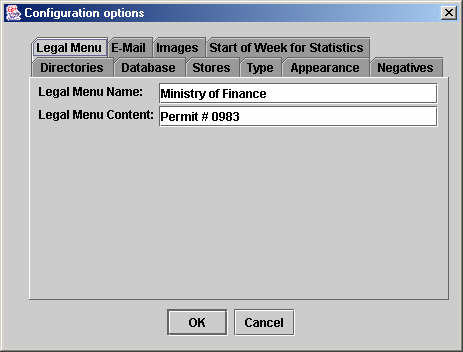
Tab 7: Legal Menu
In some jurisdictions it is useful to be able to quickly display information
that shows that XpertMart™ is in compliance with local
fiscal and other legal requirements. Therefore, there is an entry under the
File menu in the Main screen that can be defined by the user. It is in this
submenu that this entry is defined.
If you want to use this option you will need to define two fields. One possible use of this menu would be as follows: in the first field, Legal Menu Name, enter the name of the relevant authority, for example “Ministry of Finance”; In the second field, Legal Menu Content, enter the relevant authorization information, for example “Permit # 0983.” The menu would then be displayed as shown below.
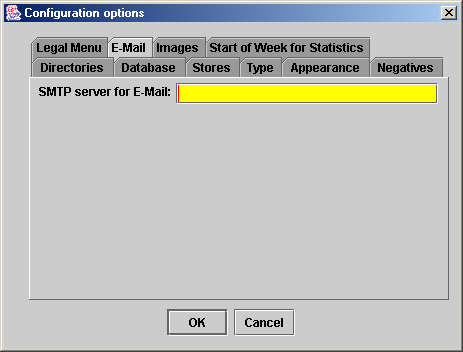
Tab 8: Email
In many catalogs such as Employees, Customers and Vendors you can send an
email directly to the person in the registry being viewed by clicking on
the email button in the tool bar. This submenu is where you specify the outgoing
mail Server (SMTP) XpertMart™ will use.
Tab 9: Images
While including images in some Catalogs can be very useful at the point of
sale and when running reports, there is also the danger that if the image
files are to large, they can significantly slow down XpertMart™’s performance. Therefore, this tab can be used manage
the size of images and thereby optimize XpertMart™’s
speed. If you are going to use images, it is highly recommended that you
make use of these configuration options.
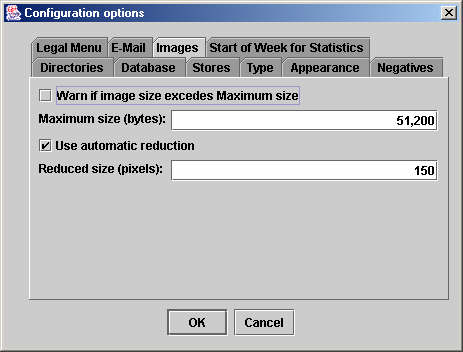
The first step in managing the images in the database you will use, is defining a maximum image size by entering this value in the Maximum Size Field. The recommended maximum file size is 51.2 kb which would be expressed as 51,200 bytes as shown in the example above. Any image larger than 51.2 kb will seriously slow down the program. The optimal image size is between 15 - 30 kb.
Once you have defined a maximum image size you have two options when the image you are about to save into the database exceeds the limit. The first option is for XpertMart™ to merely warn you that an image is exceeding the maximum limt. In this case you will have to manually modify the size of the image, if you so choose. To activate this option click on the first check box.
The second option is to have XpertMart™ automatically adjust the size of any image that exceeds the maximum limit you have defined. In this case the image will be automatically reduced to the number of pixels you enter into the Reduced Pixels Field. To activate this option click on the second check box. Reducing large images to 150 pixels (about 2 inches on your monitor) is recommended.
Tab 10: Start of Week for Statistics
Retail is a dynamic activity and success depends on making many right decisions.
Therefore, XpertMart™ offers the option of automatically
displaying the last week's and the last four week's sales, expressed both
in units and in dollars, in a window in the Stores, Departments, Vendors,
Brands and Styles catalogs. This way a retailer can constantly monitor the
relative success of each store, department, vendor, brand and style on an
ongoing basis. For more information on this feature, consult the Sales Statistics
topic.
In the Start of Week for Statistics tab you can set what will be considered the first day of the week for the purpose of calculating the Sales Statistics. In western cultures the first day of the week is Sunday while in other cultures it is Saturday or even Friday. However, in retail, weekend sales tend to be a lot larger than those during the week. Furthermore, a weekend that includes a biweekly payday will obviously have more sales than a normal weekend. If the Sales Statistics are calculated beginning with a Sunday, then the weekend is split in half and you run the risk of combining a Sunday that coincides with a payday weekend with one a Saturday that does not, distorting the weekly statistics. Therefore, XpertMart™ uses Tuesday as the default beginning of the week for the purpose of calculating the Sales Statistics since it is not part of the weekend. However, you are free to select any day of the week.
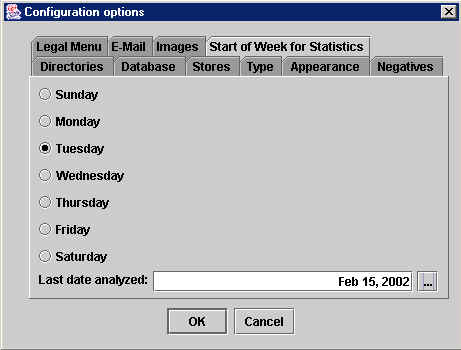
At the bottom of the window you can also see or change the last date when the Sales Statistics were calculated (Last date analyzed). When you run the Calculate Statistics process, XpertMart™ will refer to this date to determine whether enough time has passed and it needs to calculate new statistics.
The system will not use today's date when calculating Sales Statistics because it figures, quite reasonably, that today's sales have not finished being rung up. Furthermore, in the case of the Main, the most recent sales data it has is usually from the day before. Therefore, XpertMart™ looks for day of the week chosen as the Start of the Week for Statistics and choose the day before that as the last day of the week being analyzed. For example, if you've selected Tuesday as the Start of the Week for Statistics, then XpertMart™ will always use a Monday as the last day of the week.
When you run the Calculate Statistics process, the system will look for the most recent "last day of the week" that is valid. For example, if today is Thursday the 15th and you chose Tuesday as the Start of the Week for Statistics, then XpertMart™ would consider Monday the 12th as the last day of the week it can analyze. For the purposes of Sales Statistics, the "last week" in this example would be the sales from Tuesday the 6th to Monday the 12th. The Sales Statistics of "the last four weeks" would run back 28 days from Monday the 12th. If the date shown in the Last date analyzed field is not the same as the 12th, then XpertMart™ will automatically recalculate the Sales Statistics.
Configure Inventory
This submenu gives offers a variety of options to configure the way prices
are calculated and displayed and includes two tabs: Price List and Prices
Update.
Tab 1: Price Lists
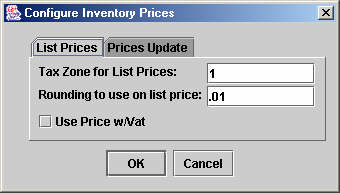
XpertMart™ gives you the option of using multiple price lists. These price lists give the user the flexibility to sell the same item at a different price depending on different variables such as the store where the item is old, the customer to whom the item is sold and even the date and time when it is sold. For additional information on pricing refer to the Prices topic.
This tab deals with the main or default price list. This is the price list the system uses unless it is told specifically otherwise. This default price list is referred to as “List Price.” The first field requires you to specify which tax zone the “List Price” belongs to. Ultimately the tax of an item is derived on the one hand, from the tax zone it belongs to (via the List Price) and the tax type it belongs to (via the style). To learn more about how taxes work in XpertMart™ refer to the Taxes topic.
In the example shown above, tax zone has been entered. The number one refers to the first entry in the Tax Zone Catalog if you were to type in the number 6 you would refer to whichever tax zone occupies the 6th registry in your Tax Zone Catalog.
You use the second field in this tab to specify the rounding you wish to apply to your prices. Often times retailers find it useful to round the price down, for example from $20.00 to $19.99 as this makes the item more attractive in the minds of many customers. The number you enter into this field is the amount in cents that is subtracted from all prices. In the example shown above, the user is specifying that $00.01 will be subtracted from every price, turning 10 dollars 9.9, 5 dollars 4.99 1.75 to 1.74, and so on.
If the user had instead entered .05, then 10 dollars would be 9.95, 5 would be 5.95 and 1.75 would be 1.70.
IMPORTANT NOTE: This field will always have a default value. Before you ever begin invoicing be sure to check this menu as a the default value may be set to .01 or another value you do not wish to use. If you do not want XpertMart™ to round off your prices, then you must enter .00 in this field. Or if you do not wish for your prices to be rounded down uniformly, then you must also enter .00 in this field and then use the Prices Catalog to do the rounding, either manually or using the Replace by Example Tool for mass changes.
Some Jurisdictions, for example in Canada and Mexico, use the value Added Tax (VAT), which requires a tax to be automatically added to prices. Usually the price displayed at the point of sale already includes this tax, for more information on VAT refer to the Taxes topic. If you are operating under the VAT system, then you must click the use prices with VAT check box. For a complete list of configuration settings to operate under the VAT system refer to the Taxes topic.
Tab 2: Prices Update
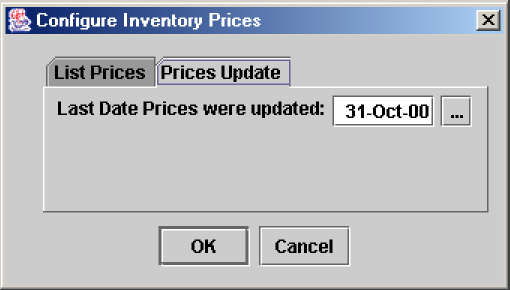
In order for XpertMart™ to operate as quickly as possible, prices are not automatically updated the moment you change a price as it would slow the system down too much for XpertMart™ system to find and replace every instance of this price at that moment. Therefore, there is a separate process to Update Prices. This tab keeps a record of the last time prices were updated. In the example shown above, October 31st 2000 is the last time prices were updated. If you are ever in doubt as to whether you have updated prices recently, be sure to check this menu before invoicing. Otherwise XpertMart™ will still display the old prices or in the case of new items display $0.00.
The date that appears in this field acts as a filter when prices are updated. Rather than search through the entire catalog of items, it is faster for XpertMart™ to search the subset of those items that satisfy the condition of having been either created or modified after this date. That is, only items whose DLM (Date Last Modified) is after the date entered in this field will be subject to the update price process. In the example above XpertMart™ will only search through items that have either been created or modified since October 31st, 2000 to see if their price has changed and therefore needs to be updated.
Note that the date on this field can be edited by pressing the button on
the right ![]() and using the XpertDate function. Although rare, there may be times when
you want to change this date to make sure items are not unduly filtered out.
(An extreme case of this if the computer lost power and shut down halfway
through the update process and althought the date changed, you are not sure
all prices were updated).
and using the XpertDate function. Although rare, there may be times when
you want to change this date to make sure items are not unduly filtered out.
(An extreme case of this if the computer lost power and shut down halfway
through the update process and althought the date changed, you are not sure
all prices were updated).
IMPORTANT NOTE: It is always safe to move this date back in time as there is no harm in redundancy, should XpertMart™ update the price twice. (In fact in some extreme cases, you may want to set the date back far enough, such as a few months or a year back, to be absolutely sure all items are being updated.) However, it is strongly recommended that you never move the date forward, as you then run the risk of skipping over some items.
If XpertMart™ is operating smoothly, it is very unlikely you will have to edit this date.
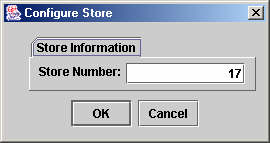
This menu displays the store number where the user is located. Users at the main are at store zero. In the example above, the user is at store 17.
Note that this field can be edited, although extreme caution should be exercised while doing so. The user can enter a different store number in this field, and when exit and re-enter the system all transactions will be attributed to the newly selected store.
Since the only reason to do this would be either to correct data that was incorrectly entered, or to sabotage the system, access to this menu should be tightly restricted. To learn more on restricting access refer to the Security topic.
Station Configure
This submenu is used to configure many of the settings behind processes at
the point of sale such as: Sale Orders (layaways) or the Daily Z Out Report,
as well as the functioning of peripherals such as a cash drawer or a portable
data terminal (PDT). This submenu is primarily used at a Remote and would only be used at a
Main if the same computer functions
as a remote. To read more about Station Configure, go to the next chapter,
Configuring XpertMart™
at the Remote.
Configure Colors
Use this submenu to set your preferences for the colors used to display catalogs
and the fields within them. Using the options in this submenu each user can
customize the look and feel of XpertMart™ to his or
her taste. Alternatively, the systems department of a large company can use
this menu to standardize the display of information (for example, all invoicing
in blue, vendors in green, customers in red, and so on) so that when a manager
walks by a computer screen, he can instantly recognize what module the employee
is working in.
The first tab on the left, Components, lets you modify the colors of the fields and the text within a screen. The remaining tabs on the left let you configure the background colors for different catalogs and documents. Each of the tabs on the left may group related catalogs; for example, clicking on the Client Catalogs tab on the left will show the current background color of the Clients, Client Types, Client Regions, Client Categories, Client Actions and Client Status catalogs (shown below). Similarly, clicking on the documents tab at the bottom left of the window will display all of the documents on the right side of the window and their current background color.
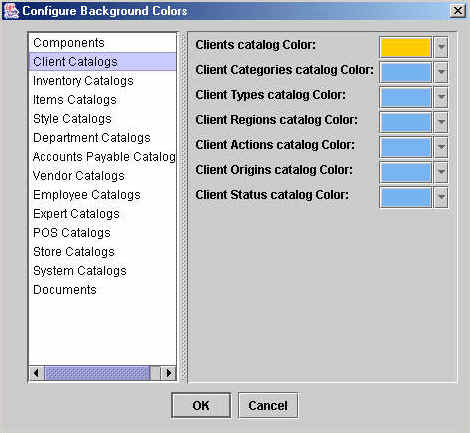
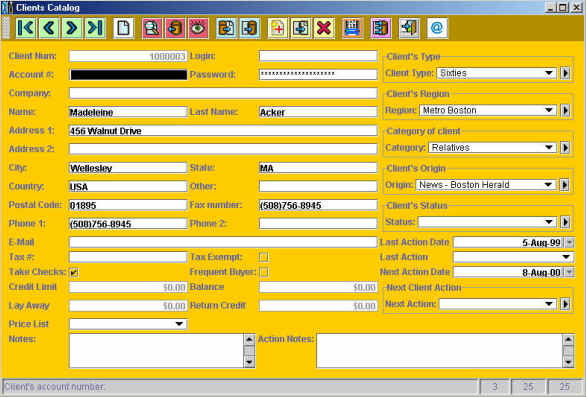
The color currently being used is shown in the rectangle next to each field. To change the color click on the button to the right to open up the color palette and select the new color you wish to use. In the example above, the background color of the Clients catalog has been changed to orange. Once the user presses <OK>,exits the system and reenters, the Clients catalog will be displayed in orange as shown below:
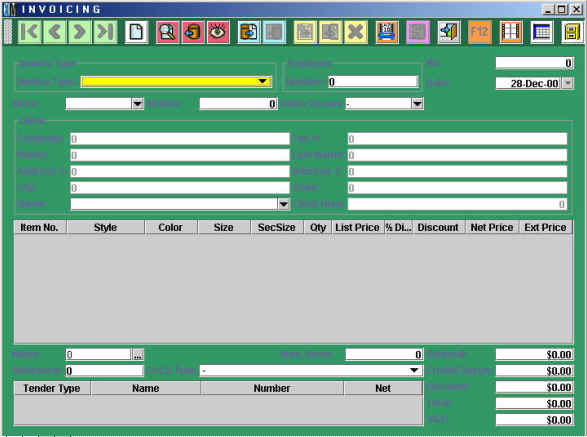
Similarly, in the example below the background color for the Invoice screen is being changed to green in the Documents tab. Note that the image includes the color palette where you select the desired color.
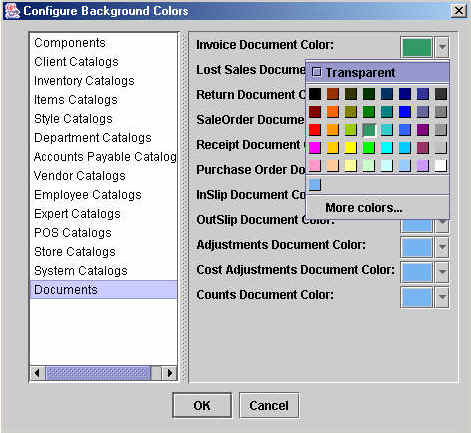
You must exit and reenter the system for the color changes to take effect. The Invoice screen would now appear green:
Components
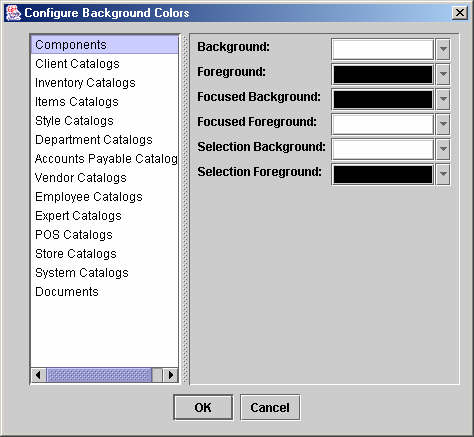
There are 6 aspects of the display within a screen whose colors can be configured:
Background, Foreground, Focused Background, Focused Foreground, Selection
Background, Selection Foreground. Background a Foregroud refer to any field
in the window that is being viewed; Focused Background and Focused Foreground
refer to the field where the cursor is at; a; and Selection Backgroun and
Selection Foreground refer to any text within a field that is selected, for
example to edit or delete. Note that the color settings for these six components
will remain the same for every catalog and document.
The default colors that XpertMart™ uses are: White for the Background, Black for the Foreground, Black for the Focused Background, White for the Focused Foreground, White for the Selection Background, Black for the Selection Foreground as shown in the image below.
In this next example, the components were modified as follows: Background: Purple, Foreground: White, Focused Background: White, Focused Foreground: White, Selection Background: White, Selection Foreground: Black. Returning to the Client catalog that was earlier given a background color of orange, you can now appreciate the changes made to the components.
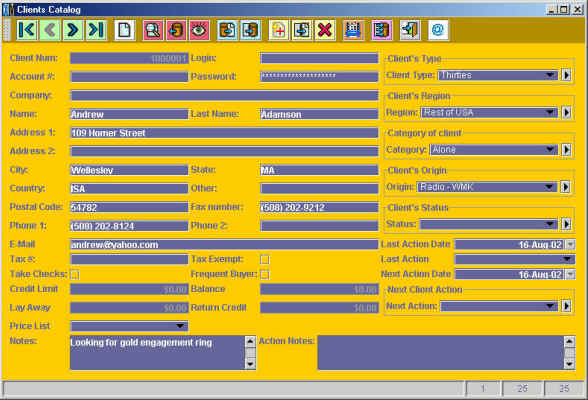
All catalogs, and not just the Clients Catalog, now displays the fields in purple (the background) and the text within those fields (the foreground) in white.
Add a Store
Use this submenu when you need to add a new store to the database. When
you select this option, XpertMart™ will ask you if
you are sure you want to add a store.
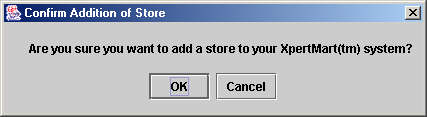
Click <OK> if you are. If you are not sure click on the Stores tab in the File Configure submenu to see how many store you currently have in the database. The system will then ask you if all users have exited the system.
Click <OK> if they have and then XpertMart™ will add the store to the database.
NOTE: Be sure to add a new registry to you Store Catalog with all the information
pertaining to this new store. Otherwise new transactions can not be ascribed
to this new location.
Copyright © 2002 XpertMart