XpertImage™ is the tool you use to add an image such as a photo or logo to a catalog such as Styles, Brands or Departments. Once you add an image to a catalog it can be used when running certain reports such as Best-Selling Styles or Best-Selling Brands. Using images can enhance these reports considerably since you will actually be able to "see" which styles and brands are selling the best. Adding images to your catalogs is also important if you are using XpertMart™'s web store software since the images stored in the catalogs are the ones that will be displayed on your web site.
Using XpertImage™, you can importing any image in the .gif, .jpg or .bmp format. However, using .jpg's is strongly recommended as they tend to be smaller files. Once you add an image to a catalog, that image is permanently stored in the Main.gdb database. This means that even if you were to erase the original image file the image would still appear in your catalogs since it is stored in the Main.gdb database file. Although you can store images of any size in XpertMart™, using smaller files whenever possible is strongly recomended. If you use too many large files (anything over 50 kb is considered large) then XpertMart™ will operate more slowly, especially when you run image-rich reports. Generally it is worth sacrificing some of the image's resolution in order to keep the file size down. You can configure XpertMart™ so that it automatically constrains the size of new images you are importing using the options in Tab 9 of the File Configure menu.
You can add an image to a catalog any time you see the words "Photo" or "Image" in a blank space as shown below.
![]()
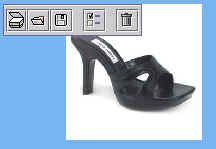
If you double-click on the blank space, the XpertImage™ toolbar will appear.
![]()
The XpertImage™ toolbar has five buttons. The first button is the Twain button:
![]()
Use the Twain button to import images directly from a digital camera or scanner. If you are going to use the Twain option, consult the manufacturer's manual to learn how to properly configure the camera or scanner for the downloading of the images. If you attempt to do a Twain and the camera or scanner have not been configured properly, you will see an error message like this one:
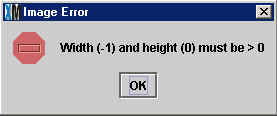
If problems witht the Twain persist, the best option is to use the camera or scanner software to save the photos to a file (preferrably as .jpgs). Once you have done this, you can use the second button on the XpertImage™ toolbar, the Open button (shown below), to import the image from a file.
![]()
When you click on the Open button, a window will appear where you can browse through the directories on your computer until you find the image you are looking for.

In the example above, the user is browsing through the "Dresses" Directory and is about to open the "LeatherSkirt.jpg" file. (Keeping your images in a C:\Main\Images directory for easy access is recommended). Once you have selected the image you want to use and click <Open>, the image will appear in the space provided in the catalog as shown below.
If you are happy with the image you have selected then you can click anywhere else on the screen and the XpertImage™ toolbar will disappear. At this point you should click on the Save button in the Catalog Toolbar to make sure the image gets stored into the Main.gdb database file.
If you made a mistake selecting the image or wish to seect a different image, you can press the Open button again and select the desired image. The new image will replace the old one. If you want to erase the image and leave the Photo/Image space in the Catalog blank, press the Delete button shown below.
![]()
The save button on the XpertImage™ toolbar (shown below) lets you save an image to an independent file.
![]()
As mentioned earlier, when you import an image into XpertMart™ using XpertImage™, that image becomes part of the database file (Main.gdb). XpertMart™ no longer needs the original image file. If the database file gets copied onto a new computer, or the catalogs are synchronized out to a Remote station) then you can view the image in the catalog even though the original file (such as "LeatherSkirt.jpg") is nowhere on the new computer. By clicking on the Save button, you can name the image and choose the directory where you want to save it. In the example below, the user is saving an image called "Monaco" in the "Photos" directory.
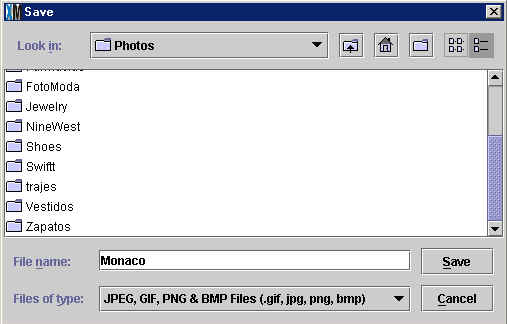
The image will now exist as a .jpg file name "Monaco.jpg" in the new directory as well as continuing to be stored in the Main.gdb database file. Use the Save button when you need to make a copy of an image to work on (perhaps to modify the size or alter the brightness). When you are done with the modifications, you can import the new image into the catalog to replace the old one.
Finally, there is the Properties button shown below.
![]()
When you click on this button a new window will appear showing some of the image's properties.
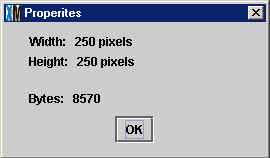
In the example above, the image being viewed is 8570 bytes large or 8.5 kb, well within the ideal size limits mentioned earlier. Use the Properties button when you have doubts about the size of the image and think it may need to be constrained to an optimal size.
Copyright © 2002 XpertMart