Adding a New Store to the Database
Chapter Topics
Adding a New Store at the Main
Adding a New Store at the Remote
To add a new store you have to be running XpertMart™
's Multi-Store Edition. If you have been using the Single Store Edition
and want to add more stores to your database, contact your Authorized Dealer
for help. Your database will first have to be split into a
Main station and a Remote station
. Once the Authorized Dealer has split your database you can add additional
Remote stations.
When you are ready to add a new store to your XpertMart
™ database, you will have to change the configuration
at both the Main
and at the new Remote
.
Adding a New Store at the Main
1) Enter a new Hasp
code by going to File>System>Apply
Hasp Code
. The Hasp code contains, among other things, instructions to the Main
on how many Remote stations are allowed. Your Authorized Dealer will give
you the new code to enter.
2) Change the configuration at the Main to add another store. Go to
Configure>Add a Store
and follow the prompts to add another store.
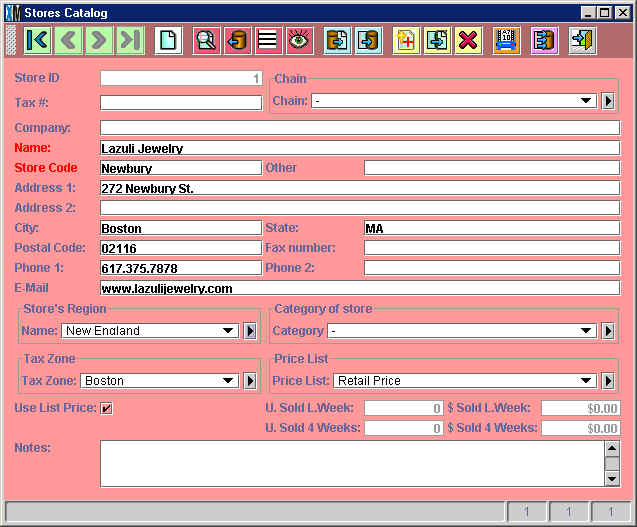
3) Add a new entry to the Stores Catalog. Press the New Record button
 in the toolbar
at the top of the catalog and fill in the information for the new store.
The Store Code you enter is what's displayed in the Stores column of the
XpertMatrix™
. The address, phone number and email will print on your
Invoices
.
in the toolbar
at the top of the catalog and fill in the information for the new store.
The Store Code you enter is what's displayed in the Stores column of the
XpertMatrix™
. The address, phone number and email will print on your
Invoices
.
4) Add a store to the
Sync Stores Catalog
by going to Syncrhonize>Configure>Sync Stores Catalog.
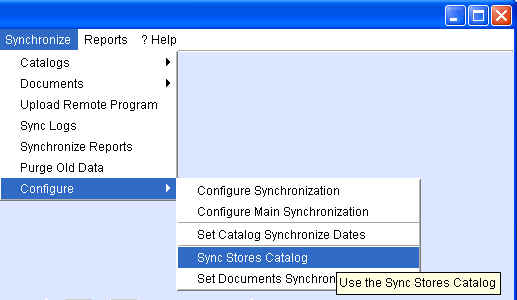
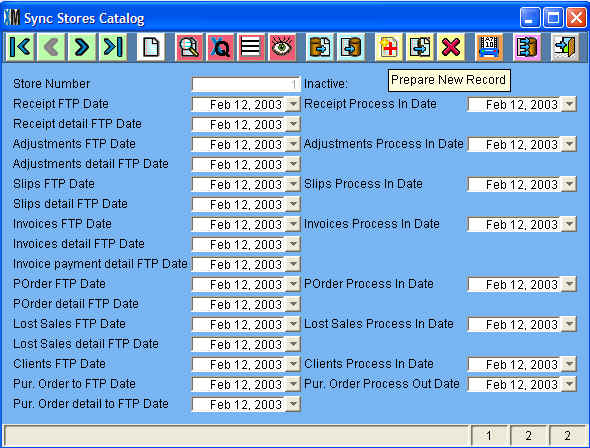
This will open up the Sync Stores Catalog. Use the
New Record button
in the toolbar to add a new entry in the catalog. Make sure the number
of stores in the Sync Stores Catalog (as shown by the
Records Bar
in the bottom left-hand corner) matches the number of stores in the Stores
Catalog.
5) Finally, when you are ready to start
synchronizing
data between the Main and the new store, you will need to configure
the synchronization dates in the new store with today's date, so it doesn't
try to send all information since January 1, 1970, only information from
this day forward. You do this at: Synchronize>Configure>Set Document
Synchronization Dates and Synchronize>Configure>Set Catalog Synchronization
Dates. This is covered in the Synchronization
chapter.
Adding a New Store at the Remote
1) Start with a blank database. There is a blank Main.gdb file on the
XpertMart™ Install CD. If you don't have
it handy, contact you Authorized Dealer who can email you one.
2) Go to Configure>Store
Configure
and enter the correct Store Number. Store Number are assigned sequentially,
so if this is the second store you are adding then the Store Number would
be 2. (The Main station is considered Store 0). This tells the program that
this remote is now Store_ID =2. Make sure you are entering the right number
by double-checking the Store Number shown in the Stores
Catalog
. Exit XpertMart™ for the change
to take effect.
3) Configure the Synchronization
. Under the Synchronization menu, go to Configure>Configure Synchronization.
Under the FTP tab, enter the address, user name and password for the
FTP Server
you will be using.
4) Make sure the computer at the new store an connect to the Internet.
4) Manually Initialize
Catalogs
at the Main. At the store, go to Synchronize>Catalogs>Download
Catalog Initialization. Wait for this to finish. Then go to Synchronize>Catalogs>Initialize
Catalogs. When this is done you should be able to open any catalog and
see your data.
5) Set the Document
Synchronization Dates
. You need to do this both at the new store and in the
Sync Stores Catalog
at the Main. Enter the date you first opened the new store. Otherwise XpertMart
™ will create synchronization files for every date since
January 1, 1970!
6) You can now either manually
do a synchronization
to make sure everything is working okay or just leave it
Scheduled
and check in on it the following day.
The next chapter
explains how to use synchronization to send new software versions and reports
out to stores.
Copyright © 2004 Dinari Systems LLC