How to Launch Reports
There are two main ways to lanch reports in XpertMart™: using the Reports Button
Chapter Topics
How to Launch Reports
XpertReportsRunner™
Parameters
XpertPreview™
Where Reports Are Stored
This chapter provides a general overview of how to run reports in XpertMart™ and how to add or replace pre-designed reports. The content
of specific reports is discussed in other chapters throughout the User Guide.
Designing new reports in another topic that is beyond the scope of this chapter.
Contact your XpertMart™ Authorized Dealer for more
details on designing new reports.
How to Launch Reports
There are two main ways to lanch reports in XpertMart™: using the Reports Button ![]() in the toolbar of any catalog, from the Reports
Menu found in the Main Menu (shown below). You can also run reports that are
specific to certain processes such as Physical Inventory, Minimums & Maximums
and Synchronization. These reports are found under the menus of their respective
processes. When you use one of these methods, the XpertReportRunner™ will open
up with a menu of possible reports to run. You can also run reports directly
from the Report Designer.
in the toolbar of any catalog, from the Reports
Menu found in the Main Menu (shown below). You can also run reports that are
specific to certain processes such as Physical Inventory, Minimums & Maximums
and Synchronization. These reports are found under the menus of their respective
processes. When you use one of these methods, the XpertReportRunner™ will open
up with a menu of possible reports to run. You can also run reports directly
from the Report Designer.
When you use the Reports Button of a catalog, only reports
pertaining to the specific catalog you were in will appear in the XpertReportRunner™ window. For example, if you are in
the Brands Catalog, only reports about brands will appear in the window, and
so on.
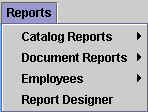
The Reports Menu, on the other hand, offers greater variety. Reports are grouped in three ways. The Reports>Catalog Reports Menu lets you open reports for the Styles, Items, Stock and Audit catalogs just as if you were using the Reports Button in any one of these catalogs.
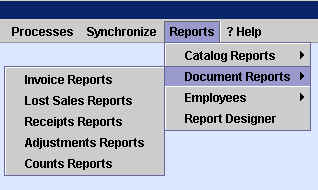
The Reports>Documents Reports Menu groups reports by document or transaction type. Invoice Reports contains all reports pertaining to sales; Lost Sales Reports to lost sales; Receipts Reports to purchasing and receiving; Adjustments Reports to adjustments to inventory and cost adjustments; and Counts Reports to counts and physical inventory.
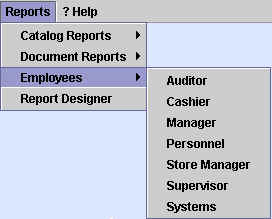
The Reports>Employees Menu groups reports by store employee or retail
function. The Auditor Menu contains all reports related to audits and cost audits;
the Cashier Menu has all of the end-of-day POS
reports; the Manager has all of the chain-level and company-wide trend
reports; the Personnel Menu has all of the employee and commissions reports;
the Store Manager Menu has all of the store-specific sales and inventory reports;
the Supervisor Menu combines some of the Auditor and Cashier reports; and,
finally, the Systems Menu has reports related to the Synchronization process.
XpertReportsRunner™
XpertReportsRunner™ displays a list of
reports available for you to view on screen or print-out. The contents of
the XpertMart™ depend on how it was launched but generally display all of the reports of
one catalog, of a transaction type or of a employee/store function.
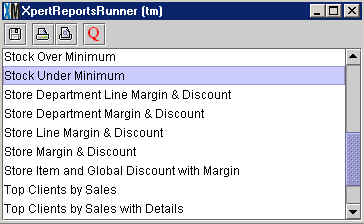
To run a report, select the report you want to run from the list displayed
in the window. A blue bar appears over the report title that is currently
selected. Use the scroll bar to the left to view more reports and find the
one that you want. Once you have selected the desired report, you have four
options:
![]() Query: Pressing this button opens the XpertQuery™ screen allowing you to modify the select and order
clauses that are underlying the query behind the report. Use this button if
you want to filter the information in the report (perhaps to only view certain
styles or departments) or to change the order in which the information is
displayed. To learn more about the select and order clauses, see the XpertQuery™ topic.
Query: Pressing this button opens the XpertQuery™ screen allowing you to modify the select and order
clauses that are underlying the query behind the report. Use this button if
you want to filter the information in the report (perhaps to only view certain
styles or departments) or to change the order in which the information is
displayed. To learn more about the select and order clauses, see the XpertQuery™ topic.
![]() Preview: Pressing this button lets you preview the report using
the XpertPreview™ tool (explained
below) before actually printing the report.
Preview: Pressing this button lets you preview the report using
the XpertPreview™ tool (explained
below) before actually printing the report.
![]() Print: Pressing this button prints the report using the default
printer you've setup in your operating system.
Print: Pressing this button prints the report using the default
printer you've setup in your operating system.
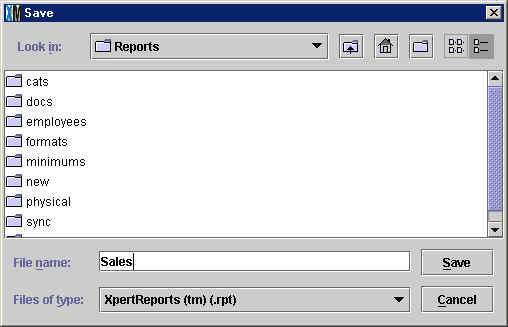
![]() Save: Pressing this button allows you to save the report in a different
directory or using a different name. This option is particularly useful when
you've made changes to the Query behind the report (see above) and want to
save the changes.
Save: Pressing this button allows you to save the report in a different
directory or using a different name. This option is particularly useful when
you've made changes to the Query behind the report (see above) and want to
save the changes.
Note: what you are saving is the design of the report (i.e. the kind
of information to pull from the database and how to display that information)
and not the data in the report itself. For example, you may modify the query
of a sales report so that it filters out certain stores. If you pressed Save,
you would save this selection criteria but you would not save the actual sales
figures for the parameter (e.g. date range) you've
chosen. However, there is no real need for you to save the data as the data
is always residing on your database. At any time you can rerun the report
using the same parameters.
When you press Save, you will see a screen (shown below) displaying the subdirectories of the "Reports" folder in C:/Main. You are free to save the report in any one of these folders. To learn more about the structure of the Reports directory, see the Where Reports Are Stored section below.
Parameters
For many reports, when you press the Preview button to preview the report, XpertMart™ will first ask you to insert a parameter
value for the report. Parameters are used to filter out unwanted information
and focus the report. Parameters, therefore, make your reports incredibly
flexible as you can use the same report to show different information each
time.
Below are the three most common types of parameters you will
be asked for when running a report:
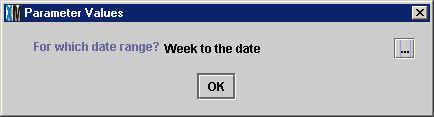
Date Parameter: Asks you to specify the
date range for the report. The date range can either be a fixed set of dates or a dynamic (i.e. relative) range. Click on the
browse button ![]() to open the XpertDate™ tool
and select the dates you want for the report. Using this parameter you can
run a report such as the Best-Selling Styles report for May 1 - May15th, or
for the entire year of 2001 or the month to date, and so on.
to open the XpertDate™ tool
and select the dates you want for the report. Using this parameter you can
run a report such as the Best-Selling Styles report for May 1 - May15th, or
for the entire year of 2001 or the month to date, and so on.
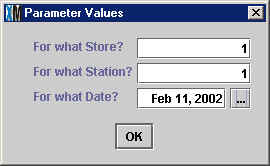
POS Parameters: Asks you to enter parameters to define a store, stations
and date for Point of Sale reports. If you
want to run the Payments Journal report showing how you were paid or the Merchandise
Journal report showing what was sold, you will need to enter the Store Number
(open the Stores Catalog to find the Store Number if you are not sure); the
Station Number (usually 1 unless there are multiple workstations setup in
the store; see the Configure>Station
Configure>Station Info menu to find your station number); and the
date you want to run the report for.
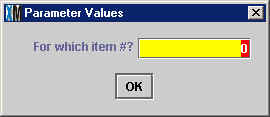
Item Number/Customer Number: Asks you to specify an item by Item Number or a customer by Client Number. You'll find this parameter
used in reports that are specific to an item (such as the Audit Log for a
Certain Item report) or specific to a customer (such as the Sales by Client
Number report).
XpertPreview™
Once you have selected the report you want to run and entered the right
parameters, the report will open up in the XpertPreview™
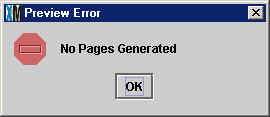
screen. If there is no data for the parameter you have chose (for example,
you selected a date range for which there were no sales or you selected an
Item Number that does not exist) you will see this error message:
Otherwise you will see the XpertPreview™ screen,
as shown below:
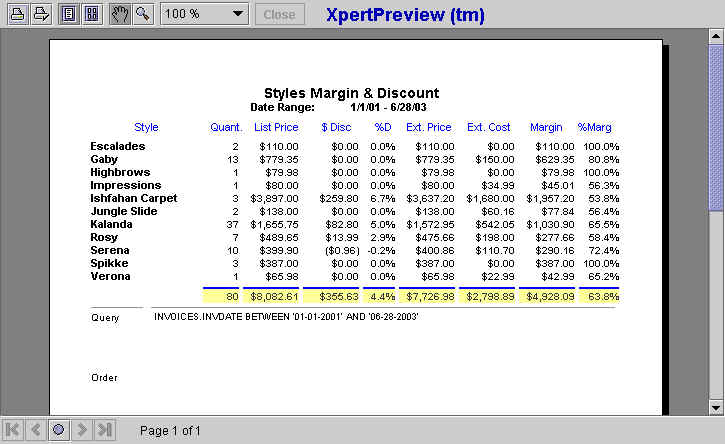
There is a toolbar at the top, a scroll bar to the left and navigation
buttons on the bottom. Each is explained below:
![]() Print: Prints the report using the default printer you've setup
in your operating system.
Print: Prints the report using the default printer you've setup
in your operating system.
![]() Page Setup: Opens a configuration window that lets you choose page
properties such as size, margins and orientation. The particulars of the configuration
window will depend on the operating system you are using.
Page Setup: Opens a configuration window that lets you choose page
properties such as size, margins and orientation. The particulars of the configuration
window will depend on the operating system you are using.
![]() See One Page: Lets you preview the report one page at a time. Use
the navigation buttons at the bottom of the screen to move to the desired
page.
See One Page: Lets you preview the report one page at a time. Use
the navigation buttons at the bottom of the screen to move to the desired
page.
![]() See Many Pages: Lets you view 2, 4 or more pages at once on screen,
depending on the size of the pages.
See Many Pages: Lets you view 2, 4 or more pages at once on screen,
depending on the size of the pages.
![]() Drag: Lets you move the page up and down the screen by clicking
the mouse button and holding it down.
Drag: Lets you move the page up and down the screen by clicking
the mouse button and holding it down.
![]() Zoom: Increase or decreases the size of the page on screen. Increase
(zoom in) by clicking the left button of the mouse and decrease (zoom out)
by clicking the right button.
Zoom: Increase or decreases the size of the page on screen. Increase
(zoom in) by clicking the left button of the mouse and decrease (zoom out)
by clicking the right button.
![]() Screen Size: This drop-down menu lets you choose the size of the
page on screen.
Screen Size: This drop-down menu lets you choose the size of the
page on screen.
![]() Close: Closes the XpertPreview™ screen.
Close: Closes the XpertPreview™ screen.
![]() First Page: Takes you to the first page of a multi-page report.
First Page: Takes you to the first page of a multi-page report.
![]() Previous Page: Takes you to the previous consecutive page of a multi-page
report.
Previous Page: Takes you to the previous consecutive page of a multi-page
report.
![]() Go To Page: Opens a Parameter Value screen asking you for a page
number. Takes you to the specified page number in a multi-page report.
Go To Page: Opens a Parameter Value screen asking you for a page
number. Takes you to the specified page number in a multi-page report.
![]() Next Page: Takes you to the next consecutive page of a multi-page
report.
Next Page: Takes you to the next consecutive page of a multi-page
report.
![]() Last Page: Takes you to the last page of a multi-page report.
Last Page: Takes you to the last page of a multi-page report.
Where Reports Are Stored
It is important that you have a basic understanding of where
XpertMart™ stores all of the reports in the event
that you need to replace one or wish to add a new one.
All of your reports are found in the Reports folder in the C:/Main directory. Within the Reports
folder you will find the following folders:
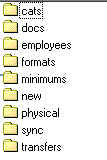
All Catalog reports are contained in the "cats" folder, all Document reports
in the "docs" folder, and so on. When you double-click on the "cats" folder
you will see the following:
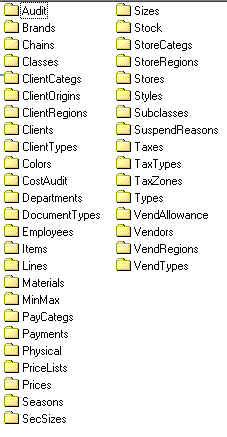
Every single catalog in XpertMart™ is represented by one of these folder. When you are in
the Brands Catalog and you press the Reports Button ![]() and the XpertReportsRunner™ screen opens up with
a menu of reports to run, what you are in fact seeing is the contents of the
C:/Main/Reports/cats/brands folder.
and the XpertReportsRunner™ screen opens up with
a menu of reports to run, what you are in fact seeing is the contents of the
C:/Main/Reports/cats/brands folder.
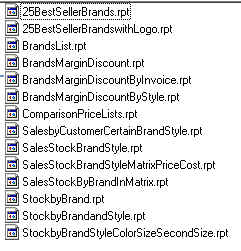
Notice that all reports in XpertMart™ have a .rpt
extension after their name. The "Sales by Customer of a Certain Brand &
Style" report is the SalesbyCustomerCertainBrand.rpt file.
Now you know that if you want to add a report to the Cashier Reports Menu
you would be pasting the relevant .rpt file into the C:/Main/Reports/employees/cashier
directory. If you need to modify the "Sales Journal" report you would look
for a file called SalesJournal.rpt in the C:/Main/Reports/docs/invoices directory.
Copyright © 2002 XpertMart